Good Morning All and a very Happy Tuesday!
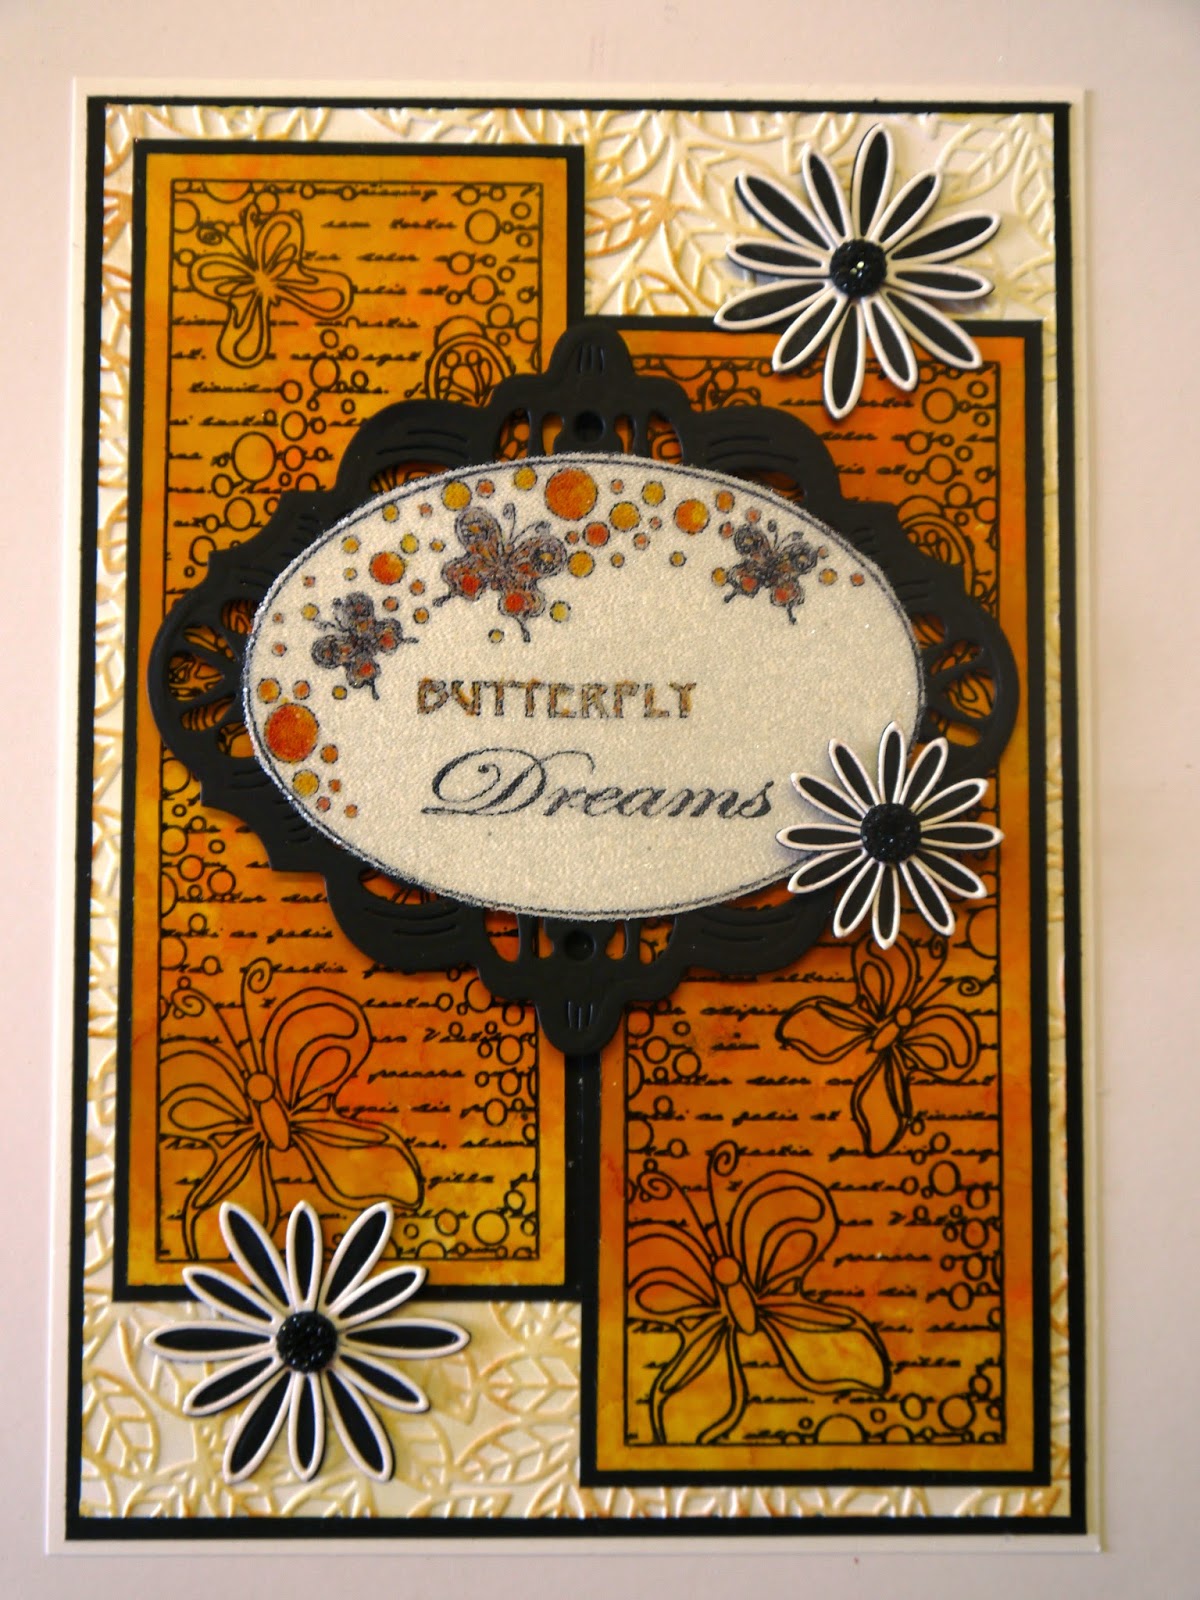
I'm back again with another project using the stamps designed for Creative Expressions by Johnathon Lockwood. This time I've used the "Elements stamps- Butterfly Dreams"
So, let's get started....
Apply Honeycomb, Sunshine Yellow and Sunset Orange Alcohol Inks to a piece of gloss card.
Ink up the "Butterfly Dreams" Striplet Stamp with Black Archival Ink and stamp onto the gloss card.
Cut out the panels and edge with the Archival Ink.
Emboss a piece of Coconut White Card with the A4 Leafy Montage Folder.
Lightly apply Wild Honey and Rusty Hinge Distress Inks to highlight the raised areas.
Matt and layer onto Black Foundations Card.
Matt and layer the panels and glue onto the background.
Ink up the Oval stamp from the A5 set with the sentiment in place.
Heat emboss with Cosmic Shimmer Clear Embossing Powder.
Paint the butterflies with the same Distress Inks as before.
Cover with Double Sided Adhesive, cut out the oval, remove the backing paper, then add Micro Beads.
Die cut a matt using the Californian Collection-Napa Valley Dies.
Glue the oval into place.
Attach to the card with 3d foam pads.
Cut out some flowers using the Delicate Daisies Complete Petals in Black card, then using white card, die cut the Delicate Daisies-Open Petals.
Glue them together and stick them into position on the card.
Add small Black Dazzlers to the flower centres.
And there's the finished card!
I do apologise about the glare in the photos....I must have chosen the sunniest day of the year so far to make this one!
Well, that's all for this week...many thanks for stopping by and leaving comments, they are much appreciated.
I should be in Turkey while you're reading this....not long before we get home!
Until next time....have a happy, crafty week!
Good Morning All and a very Happy Tuesday!
With all the sunshine we've been having, I couldn't help but use the gorgeous Sunflower stamps designed by Johnathon Lockwood for Creative Expressions.
They come in an A5 set called "Elements-Flower Frames"
So without further ado, let's get started.....
Stamp the sunflower and sentiment "Sending You Hugs" with Black Archival Ink onto Coconut White Card. Heat emboss with Cosmic Shimmer Clear Powder.
Paint the flower with Shabby Shutters, Peeled Paint , Wild Honey and Mustard Seed Distress Inks.
Trim to size.
Stamp the single sunflowers randomly onto a piece of Coconut White card and paint as before.
Matt and layer onto Black Foundations Card.
Stamp the single leaves and one flower onto a panel of white card.
Paint using the same colours as before, then matt and layer.
Glue to the left side of the card.
Matt and layer the main image and attach to the card with 3d foam pads.
Tie a triple bow from Black Seam Binding. Spritz with water, scrunch and dry. Glue into position before adding a Pastel Green Dazzler to the centre.
And there's the finished card!
The stamps are such good quality that you get a wonderfully clear impression every time.
I hope you like the finished project.....it's bright and cheerful and I hope would cheer anyone up that's in need of a hug!
Many thanks for stopping by and leaving comments....while you're reading this, we'll be flying out to Greece to meet the ship we're working on for the next 2 weeks. When I say "we", I mean my very talented OH....I'm just going to roadie for him this time!
I'll still be posting every Tuesday, you don't get rid of me as easily as that!
I did promise that I would post instructions for the glittered background I demo'd at Ally Pally, that will be on here soon so please keep checking in.
Until next time, have a happy, crafty week!
Good Morning All and a very Happy Tuesday!
I hope everyone had a great time at Ally Pally, I know I did (and spent far too much....again!). Lovely to meet up with some of you there.
Anyway, it's Tuesday again which means that it's time for a new project.
I've gone very bright this time....must be the effects of the sunshine we've had!
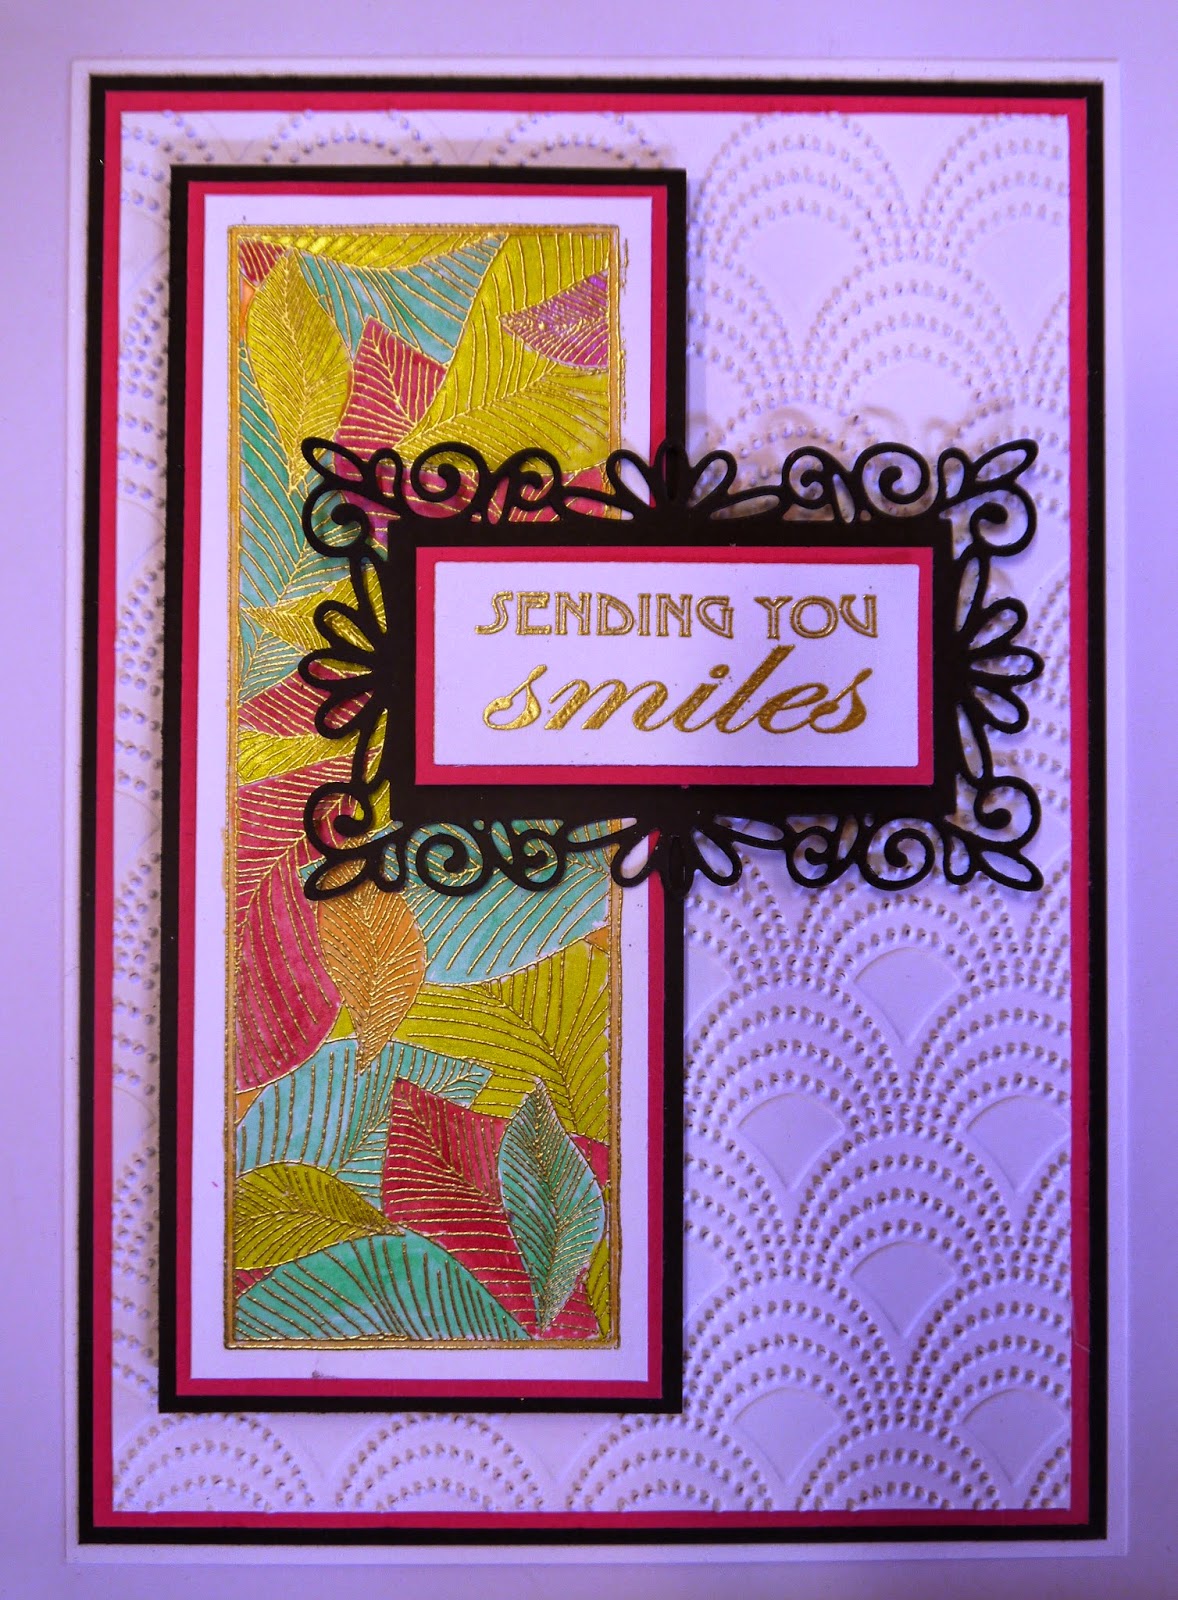
For this card I've used the Skelton Leaves Striplet Stamp and the sentiment is from the Elements-Butterfly Dreams stamp set.
Ink up the striplet stamp with Perfect Medium and stamp into Coconut White Card. Heat emboss with Cosmic Shimmer Bright Gold Metallic Powder.
Paint with Cosmic Shimmer Drawing Inks. I've used Forest Green, Rich Gold, Cherry Glow, Golden Glow and Lime Burst.
Emboss a piece of Coconut White card using the A4 Beaded Fanfare Folder.
Matt and layer the painted panel and the embossed piece of card with Raspberry and Black Foundations Card.
Attach the panel to the card with 3d foam pads.
Ink up the sentiment with Perfect Medium and heat emboss with the gold powder.
Die cut with the Dainty Rectangular Frames. The pink layer has been cut by hand.
Use glue and foam pads to attach to the card.
Die cut 3 butterflies from the Spellbinders Wonderful Wings set using the Raspberry Card.
Shape the butterflies and attach using glue just on the body section.
And that's the finished card!
Everything I've used is from Creative Expressions.
The colours remind me of the Caribbean and I think that if you're sending Smiles, the card should be bright and zingy!
The tip I would give you is, if you're using anything to paint with that has Mica on the, heat emboss the image before painting. The mica will cover the stamped lines otherwise and make them look muddy.
Well, that's all for this week. Many thanks for stopping by and leaving comments. I'll be back next Tuesday with another card using the Elements-Flower Frame Stamp Set.
Until then, have a happy, crafty week!
Good Morning All and a Very Happy Tuesday!
Only a few days to go until Ally Pally and I'm up to my ears prepping the demos! I'll be doing 3 on Saturday and 2 on Sunday in the main demo area so I hope you'll pop in and say hi. Other than that, I'll be on the Rubbernecker Stand with the fab Sue Wilson. You'll even get the chance to meet Mr.S!!!
Anyway, let's get on with this weeks project.....
For this card, I've used the new Elements Stamps - Butterfly Dreams designed by Jonathon Lockwood for Creative Expressions.
Use the Spellbinder Circle Dies to cut 3 different sized holes in a piece of acetate.
Using this as a mask, stencil through with Pink Sherbet and Aqua Adirondack Inks on Cut 'n Dry Foam.
Overlap some of the circles.
Stamp the butterflies from the set onto the circles with Black Archival Ink.
Stamp the bubble stamp in between the circles.
Add a strip of Black Seam Binding to the left hand side.
Matt and layer onto Black Foundations Card.
Stamp the sentiment onto Coconut White Card.
Paint the letters with the same inks as before.
Trim to size then stamp a couple of butterflies in the spaces and paint them.
Matt and layer onto black card.
Put onto the background with 3d foam pads.
Tie a triple bow with the seam binding and attach with a glue dot.
Add a Lilac Dazzler to finish.
And that's the completed card.....hope you like it!
Well, apart from thanking you for stopping by and leaving comments, that's all for this week.
I'll be back next Tuesday with another make using these gorgeous stamps.
Until then, have a happy, crafty week!