About Me

My photo
Hi, I'm Pam and thank you for visiting my blog. I have been making cards for over 10 years and am an independent demonstrator for Creative Expressions. I am lucky enough to teach on cruise ships and also get the chance to demo at The Big Stamping and Scrapbooking Show at Alexander Palace. I run workshops for a local craft shop and if anyone would like details of the them please e-mail me at stephen.smith870@ntlworld.com I love to scrapbook but my all time favourite thing is to get messy with ink!

Wednesday 30 April 2014

Come Fly With Me!

Good Morning one and all. 

I thought I'd re-visit one of my favourite stamp sets for today's Creative Studios Project.  It also gave me a chance to use some gorgeous Graphic 45 paper that I've had waiting for a card like this!

I've used the Hot Air Balloon and sentiment from the stamp set and the background has been embossed using one of the new Sue Wilson Embossing Folders.  This one is the A4 Quilted Flowers.

It's a nice easy card to make but if you'd like the full step by step, it's on the Creative Studios Website.  Just head there and go to the Design Team button on the toolbar at the top.

Sam Poole has sent us some fantastic new Nautical themed stamps to play with so pop back next week for a project using those.

If anyone didn't see, I'm having an "Open Day" at home on May 11th.  Please see the previous post for details.

Once again, many thanks for visiting and leaving comments.  I know how time consuming it is to leave them, but they are appreciated.

So, until next time, have a happy, crafty week!

Tuesday 29 April 2014

Pretty in Pink!

Good Morning All and welcome to my Creative Expressions DT post.

After the wall hanging last week, I thought I'd make a door hanger for this week's project.  Not like me, I even made it in pink!  Anyway, here we go with the instructions...

Cover a chipboard door hanger with Tin Holtz Shabby Vintage Paper. 
Randomly stamp the Creative Expressions Botanical Spray Singles Stamp with Black Archival Ink.
Distress the edges with Worn Lipstick Distress Ink.

Paint around the edges with Cosmic Shimmer Graphite Shimmer Paint.

Die cut 2 shapes from the Sue Wilson Californian Collection Basic Frame Set A and another 2 from the Decorative Frames B.  With the die still in place on the smallest shape, distress with Spun Sugar Distress Ink.  Remove the die and stamp the bee from the stamp set with Worn Lipstick Ink and the sentiment from the Artsy Floral Stamp Set with Black Archival Ink.  Matt and layer adding the top piece with 3d pads.

Cut the leaves using the Sue Wilson Faux Quilled Leaves Craft Dies from Foundations Black Cardstock.
Emboss a piece of Coconut White Cardstock with the Creative Expressions Interlocking Circles Embossing Folder.
Die cut the flowers from the Classic Rose Craft Die Set.

Make the roses into 3d flowers.  Glue the sentiment into place then add the leaves and flowers to finish.

And that's the finished project!  I hope you like it.

The new dies are gorgeous to use and cut so well.  I can see me using them over and over again!

Onto other matters!  Thank you to everyone who came to the April Workshops, I hope you all had a good time (even without the usual Distress Inks!)  The workshop for June 14th is now sold out but there are a few spaces left on June 28th.  Please phone Henry at the shop to book.

I promised an "Open Day" in my studio at the bottom of the garden!  It's going to happen on 11th May between 10am and 4pm.  I'll have lots of 12x12 papers and 12x12 cardstock for sale as well as being able to show you some of the new stamps and dies.  It'll also be an opportunity to ask any crafty questions and try out the Melt Pot etc.
I haven't put my address on here (thought it would be best not to!).  If you'd like to come along please e-mail me (the addy is at the top of the page) or phone on 01304 332277 and I'll give you directions.  It is in River near Dover and very easy to find!
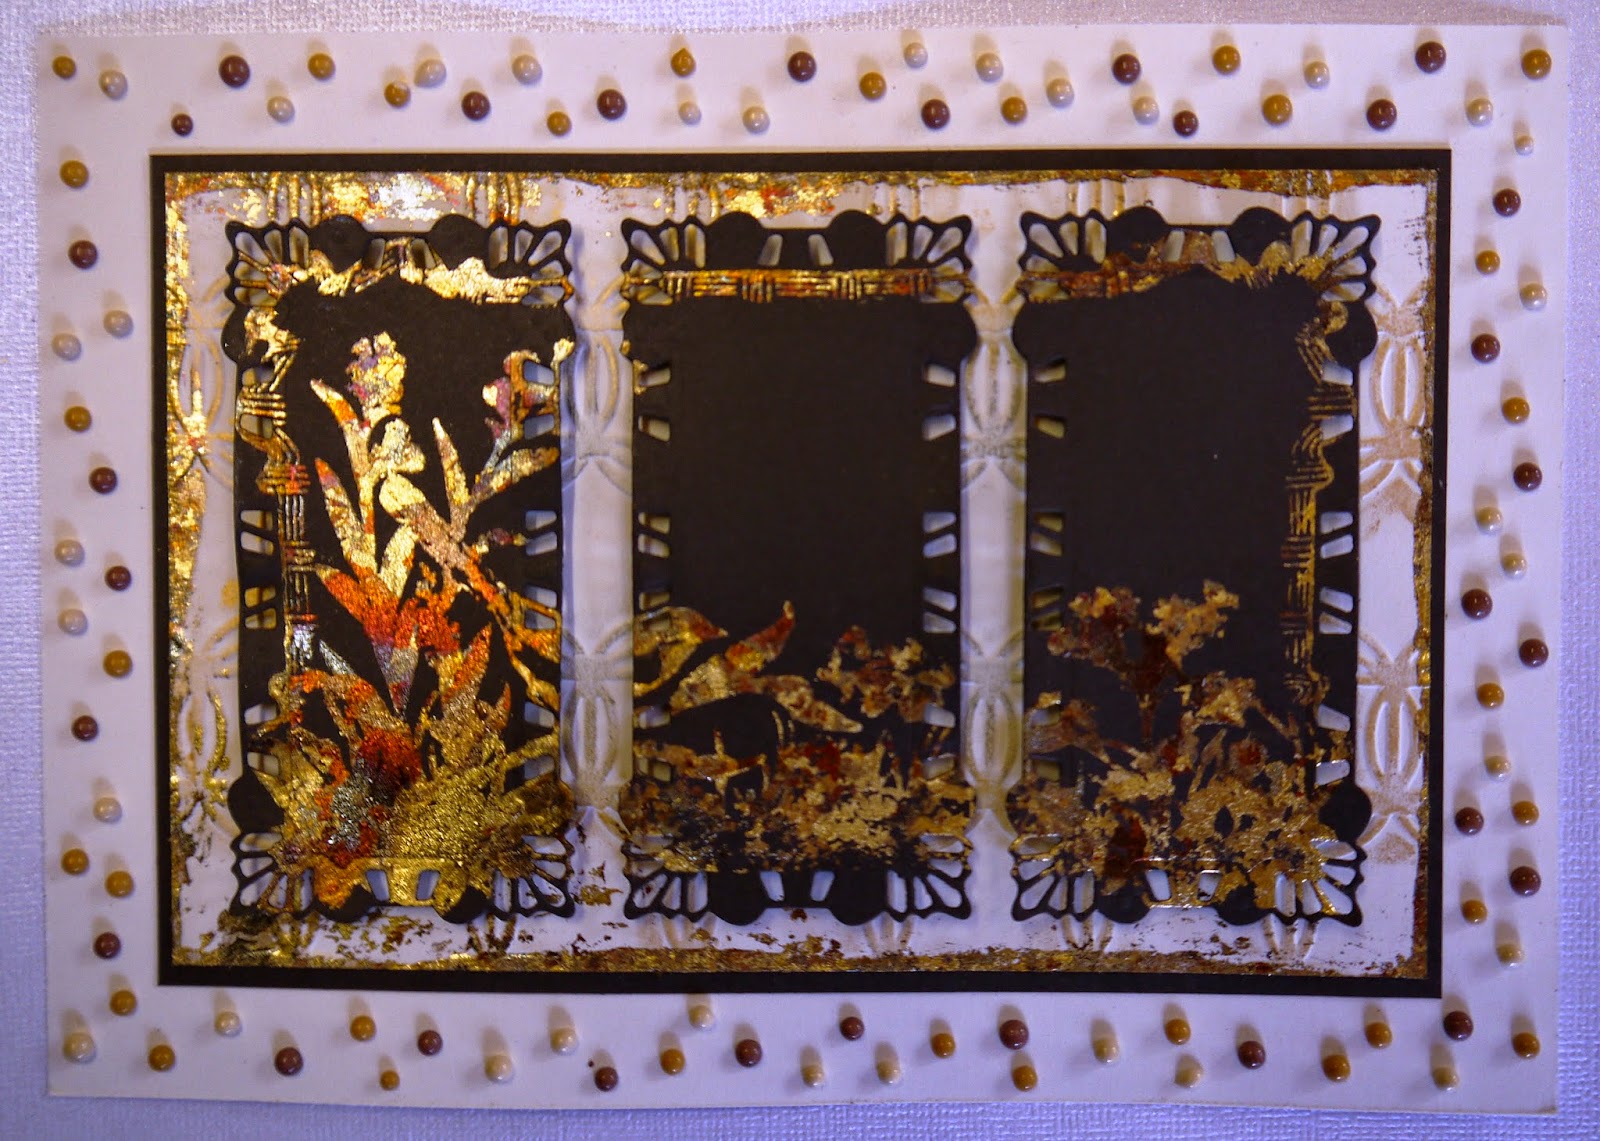
And just to finish, here's a card made using the Spanish Collection of dies, a matching stamp from the Singles Range and Gilding Flakes.
 
I'll be back in the morning with a new project for Creative Studios, so until then, have a great day and many thanks for visiting.  Hope to see you on May 11th!

Wednesday 23 April 2014

More Woodland Fun!

Good Morning All and a very Happy Wednesday to you.

I've been playing with the Woodland Animal Stamps again.  They really are so versatile that coming up with new designs is really easy.  I hope you're not bored with them yet!!  I do promise something different for next week!

Anyway, here's today's project.

I've used 4 of the animals plus one of the circle stamps.  I've put the full "how to make it" on the Creative Studios Design Team Blog.  I do hope you'll pop over and take a look.

Sam Poole has some lovely ideas for these stamps as well as the other DT members.

I can't get in my craft studio at the moment.  I've ordered some new storage (in an effort to tidy up and be able to find things!).  I've taken all the old storage out and have everything piled up on the floor.  I'm hoping that it's delivered today and that my fab OH will crack on with putting it together.  I've offered to help but have been told to stay out of the way!

I'll post a piccie on here when it's all looking lovely...I might even have an open day!

So until next time, have a great week and keep crafting!

Tuesday 22 April 2014

Crackle Heart

Good Morning All, hope you all had a very Happy Easter.  I read somewhere that any chocolate eaten at Easter contains no calories, so that's all right then!

I gave a demo at Ally Pally showing the crackle technique and promised that I would put it on my blog so , without further ado, here is today's project for Creative Expressions.

Paint the Pronty MDF Heart with 2 layers of Cosmic Shimmer Heritage Green Chalk Paint.  Give a blast with a heat gun to start drying it (a bit like towel drying your hair!)
Paint some PVA glue in streaks over the heart.  Whichever way you paint the glue is the direction that the cracks appear.
Lightly dry again just to take off the excess moisture.
Paint a layer of Cosmic Shimmer Vanilla Chalk Paint over the top and dry thoroughly.  The cracks will then appear leaving the base colour showing through.

Ink up the Botanical Spray Singles Stamp with Potting Soil Archival Ink and stamp randomly over the heart.

Edge the heart with Gathered Twigs Distress Ink
Stamp the sentiment from the Art Sayings Stamp Set onto a piece of card which has been painted with the Vanilla paint.
Die cut using the Sue Wilson Galicia Die set.
Paint some card with the Heritage Green Paint and die cut using the Sue Wilson Valencia Die set.  Using 2nd generation stamping, stamp the Botanical Spray onto it.

Shape and glue on using Cosmic Shimmer Dries Clear Glue.

Paint some more of the card with the Heritage Green and using the Spellbinder Spiral Blossom3 dies, cut some flowers.  Make up into 3d flowers and add a light brush of Vanilla Paint to the edges of the petals.

Paint some Seam Binding with the 2 paints and use some brown seam binding to tie onto the hanger.

Punch 2 holes into the top of the heart (a Crop-a-dile) will go through really easily).
Attach some jewellery wire and curl it around a pencil for added interest.
Tie the seam binding into place.
Glue on the flowers and add a few pearl swirls to finish.

And there's the finished wall hanging.  I hope you like it!

Well, that's all for today, I'll be back in the morning with a new project for the Creative Studios Design Team.  I hope you'll pop back for a look.

Many thanks for visiting and leaving comments, they really are appreciated.

Wednesday 16 April 2014

Woodland Fun

Wednesday again so I'm back with another card for Creative Studios featuring the Woodland Animal stamps.

I've used a few of the different characters on this card as well as the background Tree Stamp.

As always, there's a step by step on the CS website but here's a look at the finished card.

I thought that the tree might be a bit fiddly to cut out but it was surprisingly easy....I'm not known for my love of cutting out!

A couple of weeks ago I went to a workshop at The Artistic Stamper in Faversham.  I had to go as we were using Graphic 45 papers!  Anyway, I thought I'd show you a couple of piccies of the finished project. 

The outside of the box.


And the inside!  We used the Botanical Papers and they were as gorgeous as ever.  The box was painted with the Ranger Distress paints.  They give a really good coverage.

I was mightily impressed with the finished article and plan to use it for my record cards that I plan my workshops on.

Well, that's all for today.  Thank you for visiting and so until next time....keep crafting!

Tuesday 15 April 2014

Golden Wonder!

Good Morning All, back again with another project for Creative Expressions to share with you.  The "Golden Wonder" doesn't refer to crisps, but rather to the fact that I got carried away with the Cosmic Shimmer Bright Gold Embossing Powder!

Anyway, here's the step by step.

Ink up the Ivy Corner Singles Stamp with Perfect Medium and stamp onto Foundations Mocha Cardstock in 2 corners.  Heat emboss with Bright Gold Powder.
Use a pair of scissors to distress the edges.
Dry emboss with the A4 Sea Garden Embossing Folder.
Go over raised areas and the edges with Vintage Golden Green Gilding Wax.
Cut a piece of Dark Roast Coffee Foundations Card to size, distress with scissors then matt and layer.  Glue onto a card blank made with Foundations Milk Card.

Cut 2 Spellbinder Scalloped Circles Large, 1 from Milk card and the other from the Dark Roast Coffee.
Cut a Spellbinder Standard Circle Small from the Mocha Card.

Ink up the Botanical Spray Singles Stamp with Perfect Medium and stamp over the Standard Circle.  Heat emboss with Bright Gold Powder.
Rub some of the Gilding Wax around the edges of the Scalloped Circles them matt and layer.


Stamp a sheet of Milk Card with the Botanical Spray and heat emboss as before.

Cut flowers out using Spellbinder Spiral Blossom 3 and make up into 3d flowers.  Add Gilding Wax to the tips of the flowers.
Die cut leaves from the Foliage Spellbinders set from the same piece of card.  With the die still in place, add some Gilding Wax.
Arrange onto the card and glue into place.

And there's the finished project!

It's really rich and textured and would make a great Golden Wedding Anniversary Card.  I hope you like it.

I had a great time at Ally Pally and hope you enjoyed all my demo's....I seem to have become a fixture in the demo area!

Many thanks to everyone who came to the workshop on April 5th, a good time was had by all!  Looking forward to seeing the next class later this month.  The workshop has now sold out but I have classes planned for June.  The shop has the details of the dates and what we'll be doing so please give them a ring if you're interested.

Well, that's all for today, back again tomorrow with a project for Creative Studios.  Many thanks for visiting and leaving comments.

Wednesday 9 April 2014

Mister Sprays and Texture Paste

Well, here we are again, back with another project featuring Sam Poole's fab Woodland Animal stamps.

This time I've also used the new Doodle Cross Mask along with the new Cosmic Shimmer Mister Sprays and Sparkle Texture Paste.

It's wonderful to have so many new products come out at the same time...lots to play with!

I did dig out a tree stamp that Sam designed a little while ago for this card....it's great to have products that you can mix and match.

I hope you like it...it would be a great card for a new baby boy (just change the colours for a girl!)

All the demo's are prepped ready for Ally Pally.  I've got Cosmic Shimmer Paint techniques and Ink Spray Mister Techniques lined up so I do hope you'll be able to join me there.

The workshops at Martells have sold out but there will be more in June.  I'll have the dates on here next week.

Until next time, thanks for visiting and leaving any comments.  Have a great week!

Tuesday 8 April 2014

New Singles Stamps

I've been lucky enough to be sent 2 of the new Singles range of stamps to play with this month as well as some of the new Cosmic Shimmer Misters.....I do love being on the Design Team for Creative Expressions!

This week I thought I'd combine the 2 stamps for this card.  So without further ado, let's begin!

Ink up the Ivy Corner stamp with Perfect Medium and stamp onto Coconut White Card.  Heat emboss with Clear Powder.
Spritz the Cosmic Shimmer Aqua Breeze Ink Spray Mist all over.  Dry then use a wet wipe to smear the ink around (as well as lifting it from the embossed image).

Spritz the mister onto a craft sheet and ink up the same stamp with it.  Stamp onto the card and blot to dry.
Spray some water onto your hand and flick water droplets onto the card.  Blot again to dry.

Distress the edges of the card with scissors then go around the edges with Seedless Preserve Distress Ink.
Dry emboss with the A4 Sea Garden Embossing Folder.  Highlight the raised areas with Seedless Preserve Ink.

Ink up the Botanical Spray stamp with Perfect Medium and stamp onto Coconut White card 3 times.  Heat emboss with Cosmic Shimmer Clear Powder.  Spray some Aqua Breeze Mister onto a craft sheet and pick up the ink with Cut 'n Dry foam.  Dab over the stamped image.
Emboss again with the Sea Garden A4 Folder.  Distress with Seedless Preserve Ink.

Die cut using Spellbinder Labels H in 3 different sizes to create a Pyrimage effect.  Draw around the largest of the dies used on black card and cut out to create a matt.  Matching the patterns up, put together with 3d pads.

There will be 2 leftover frames, glue these onto the card for added interest and texture.

Glue the 3d element onto the card.

Die cut 3 Butterflies using Spellbinder Les Papillons 2 from Coconut White card, shape and glue into place.  Add a 3mm black pearl to the bodies of the butterflies.

And we're finished!

Well, this is my last posting before Ally Pally.  I do hope that I'll see some of you there.  Please pop over and say hello.  I've also just received my copy of the Creative Expressions Project Book 3 and I've got to say, it is an enormous thrill to see one of my projects in it!

So until next time, have a great week and keep crafting!

Wednesday 2 April 2014

Squeek!

Good Morning All and a very Happy Wednesday.

Did you catch Sam's shows on Create and Craft on Sunday?  I hope they gave you lots of inspiration for using the lovely Woodland Animal stamps.

Here's my take on using Squeek the Mouse and the Tree stamp.


I've also used patterned papers from the 8x8 Teresa Collins Paper Pad.  As you can see, the melt Pot has also come out to play!

As always, the full "how to" complete with photos, is on the Creative Studios site so please pay a visit and take a look.

I hope you like this one, it's one of my favourites.  I will admit that it was luck that the eye area stamped onto one of the circles!

Well, that's all for today.  Thank you for leaving comments, they are all appreciated.  Until next time, keep crafting!

Tuesday 1 April 2014

Loving Texture Paste!

Good Morning All and a very Happy Tuesday.

I have been having a lot of fun this week with the new Cosmic Shimmer Sparkle Texture Paste and Spray Misters.

This card was a lot of fun to make and I think I'd quite like wallpaper that looks like the background!  Anyway, enough rambling, let's get on with the project.

Spritz Aqua Breeze and Evergreen Cosmic Shimmer Vintage Ink Spray Misters onto Coconut White Card.
Lay the Damask Mask over the top and tape it into place.
Spread the Cosmic Shimmer Midnight Sparkle Texture Paste over.  Carefully lift the mask off.  Leave to dry.

Matt and layer onto Coconut White and Foundations Black Cardstock.

Using a Piercing Ruler, pierce around the edge of an 8x8 blank card.  Glue the prepared background into place.
Add 3mm and 5mm Black Self Adhesive Pearls around the edge of the card.

Spray a square of Coconut White card with the same inks as before.  Stamp a sentiment with Black Archival Ink and heat emboss with Cosmic Shimmer Clear Powder.  Stamp the Bee from the Botanical Spray Singles Stamps and heat emboss.  Matt an layer onto Black and White Card.
Mount onto the card with 3d foam pads.


Tie a triple bow with Black Seam Binding and glue onto the card.
Use Spellbinder Spiral Blossom 3 Die to cut a flower from Black Card.  Make the flower up and glue into place on top of the bow.

And there is the finished card!
 
I hope you like it!  Many thanks for visiting and leaving comments, I really do appreciate them.  So, until tomorrow, have a great day!