Good Morning All and a very Happy Tuesday!
I hope everyone had a great time at Ally Pally, I know I did (and spent far too much....again!). Lovely to meet up with some of you there.
Anyway, it's Tuesday again which means that it's time for a new project.
I've gone very bright this time....must be the effects of the sunshine we've had!
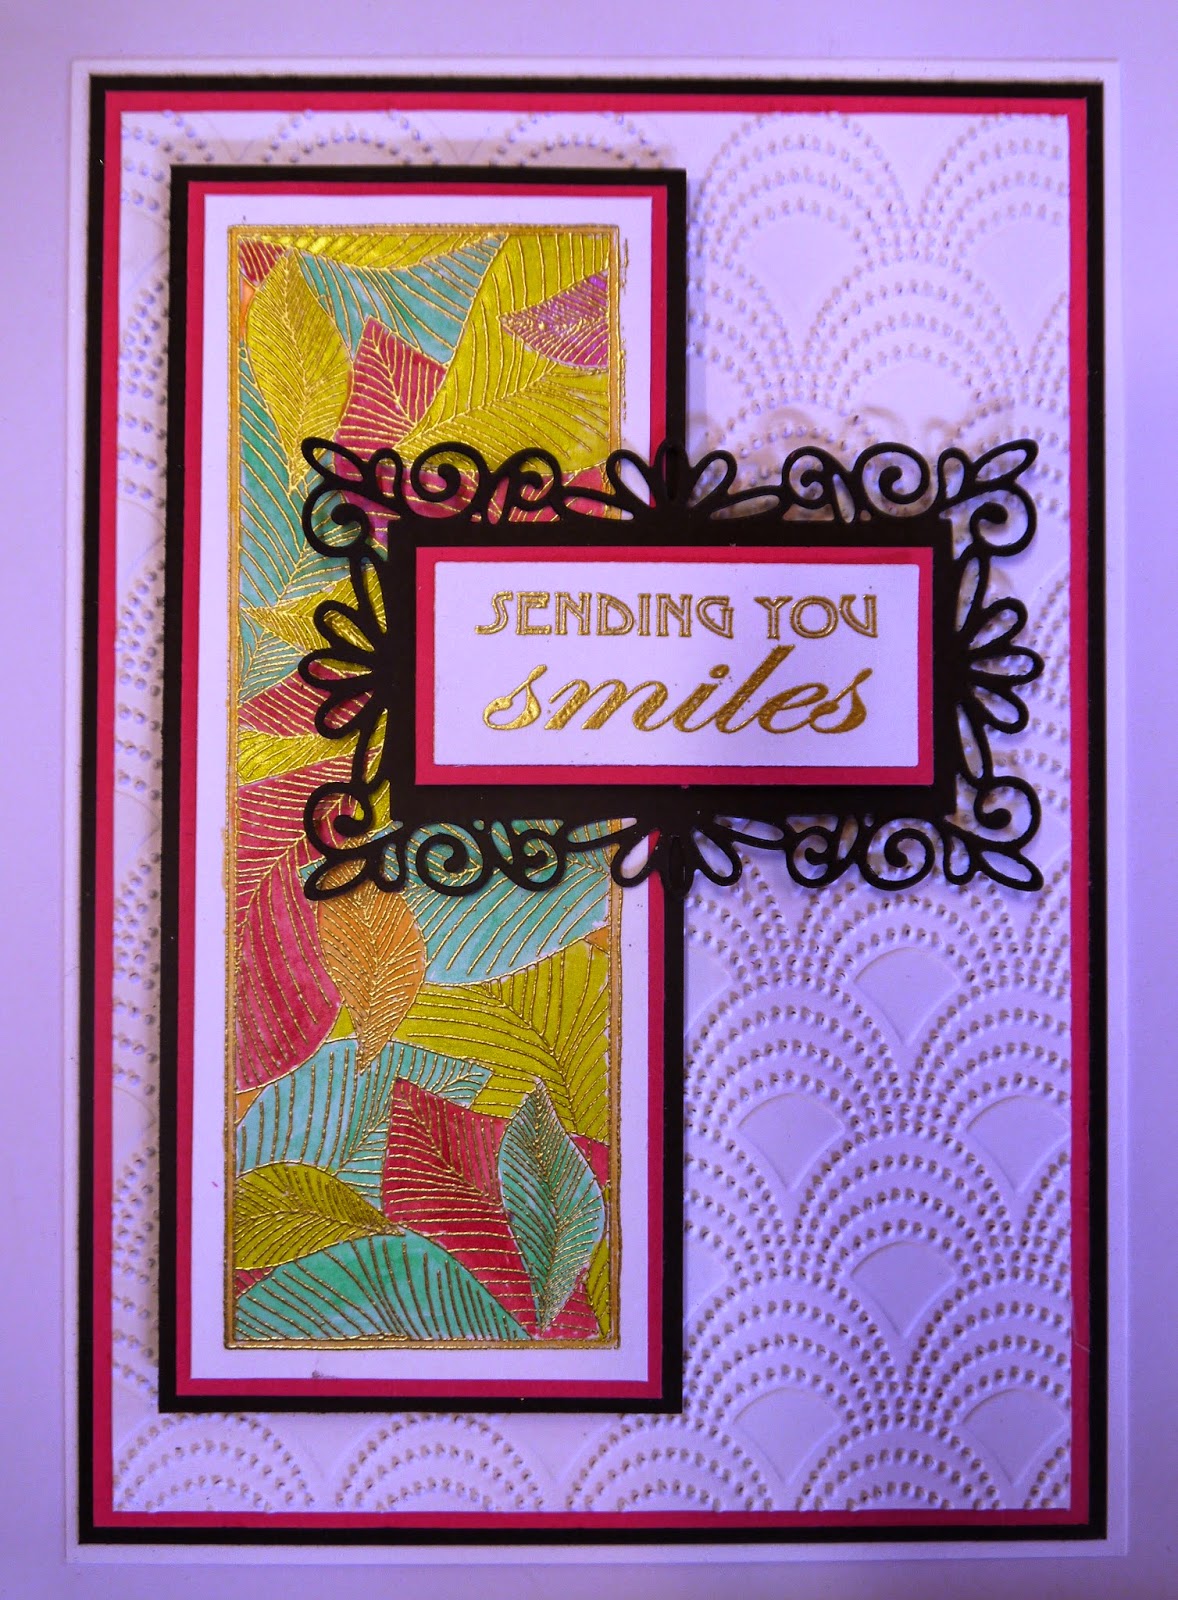
For this card I've used the Skelton Leaves Striplet Stamp and the sentiment is from the Elements-Butterfly Dreams stamp set.
Ink up the striplet stamp with Perfect Medium and stamp into Coconut White Card. Heat emboss with Cosmic Shimmer Bright Gold Metallic Powder.
Paint with Cosmic Shimmer Drawing Inks. I've used Forest Green, Rich Gold, Cherry Glow, Golden Glow and Lime Burst.
Emboss a piece of Coconut White card using the A4 Beaded Fanfare Folder.
Matt and layer the painted panel and the embossed piece of card with Raspberry and Black Foundations Card.
Attach the panel to the card with 3d foam pads.
Ink up the sentiment with Perfect Medium and heat emboss with the gold powder.
Die cut with the Dainty Rectangular Frames. The pink layer has been cut by hand.
Use glue and foam pads to attach to the card.
Die cut 3 butterflies from the Spellbinders Wonderful Wings set using the Raspberry Card.
Shape the butterflies and attach using glue just on the body section.
And that's the finished card!
Everything I've used is from Creative Expressions.
The colours remind me of the Caribbean and I think that if you're sending Smiles, the card should be bright and zingy!
The tip I would give you is, if you're using anything to paint with that has Mica on the, heat emboss the image before painting. The mica will cover the stamped lines otherwise and make them look muddy.
Well, that's all for this week. Many thanks for stopping by and leaving comments. I'll be back next Tuesday with another card using the Elements-Flower Frame Stamp Set.
Until then, have a happy, crafty week!
Good Morning All and a Very Happy Tuesday!
Only a few days to go until Ally Pally and I'm up to my ears prepping the demos! I'll be doing 3 on Saturday and 2 on Sunday in the main demo area so I hope you'll pop in and say hi. Other than that, I'll be on the Rubbernecker Stand with the fab Sue Wilson. You'll even get the chance to meet Mr.S!!!
Anyway, let's get on with this weeks project.....
For this card, I've used the new Elements Stamps - Butterfly Dreams designed by Jonathon Lockwood for Creative Expressions.
Use the Spellbinder Circle Dies to cut 3 different sized holes in a piece of acetate.
Using this as a mask, stencil through with Pink Sherbet and Aqua Adirondack Inks on Cut 'n Dry Foam.
Overlap some of the circles.
Stamp the butterflies from the set onto the circles with Black Archival Ink.
Stamp the bubble stamp in between the circles.
Add a strip of Black Seam Binding to the left hand side.
Matt and layer onto Black Foundations Card.
Stamp the sentiment onto Coconut White Card.
Paint the letters with the same inks as before.
Trim to size then stamp a couple of butterflies in the spaces and paint them.
Matt and layer onto black card.
Put onto the background with 3d foam pads.
Tie a triple bow with the seam binding and attach with a glue dot.
Add a Lilac Dazzler to finish.
And that's the completed card.....hope you like it!
Well, apart from thanking you for stopping by and leaving comments, that's all for this week.
I'll be back next Tuesday with another make using these gorgeous stamps.
Until then, have a happy, crafty week!
Good Morning All and a Very Happy Tuesday!
I can't believe that it's the end of the month already but that means this is the last blog using the new Couture Creations Dies and onto something new next week!!!
I think I've saved one of the best till last but I'll let you be the judges of that! Anyway, here goes....
Cut a square of Couture Creations Vintage Rose Garden paper to size and distress the edges with a pair of scissors.
Cut a strip of coordinating paper to size and distress with scissors. Glue onto the square of paper then matt and layer onto Black Foundations Card.
Cut an Oval using Spellbinders Classic Oval Large Dies from Coconut White Card. Leave the die in place and lightly distress with Antique Linen Ink.
Die cut Couture Creations Intricutz Vintage Rose Collection Garden Lamp from patterned paper.
Glue onto the oval.
Cut the same die using white card and cut off the banner at the bottom. Stamp the sentiment Breathe from the Creative Expressions A5 Art Sayings Stamps.
Glue onto the paper die.
Cut a Spellbinders Scalloped Oval from Black Card to matt.
Attach to the card with 3d foam pads.
Die cut Spellbinders Spiral Blossom 3 using paper from the pad. Roll into 3d flowers.
Use a little Shabby Shutters Distress Ink on the edges of the petals.
Glue onto the card.
Use the Spellbinders Foliage Dies to cut leaves from black card. Glue into position.
Cut the word "Smile" from one of the pieces of paper in the pad. Matt and layer onto black card.
Add to the main card with 3d foam pads to finish.
And there we have it!
I hope the instructions were clear!
Well, that's it for this week. As always, many thanks for your visit and leaving comments.
I'll be back next week with new goodies to show you and I might even leave a few hints about what I'll be demoing at Ally Pally!!!
Until next time, have a happy, crafty week!
Good Morning All and a very Happy Tuesday!
I'm still playing with the new Couture Creations Dies and having a ball! I love the fact that although they're very intricate, they cut beautifully and release so easily that I haven't even needed to use wax paper with them.
Anyway, on with this weeks project.
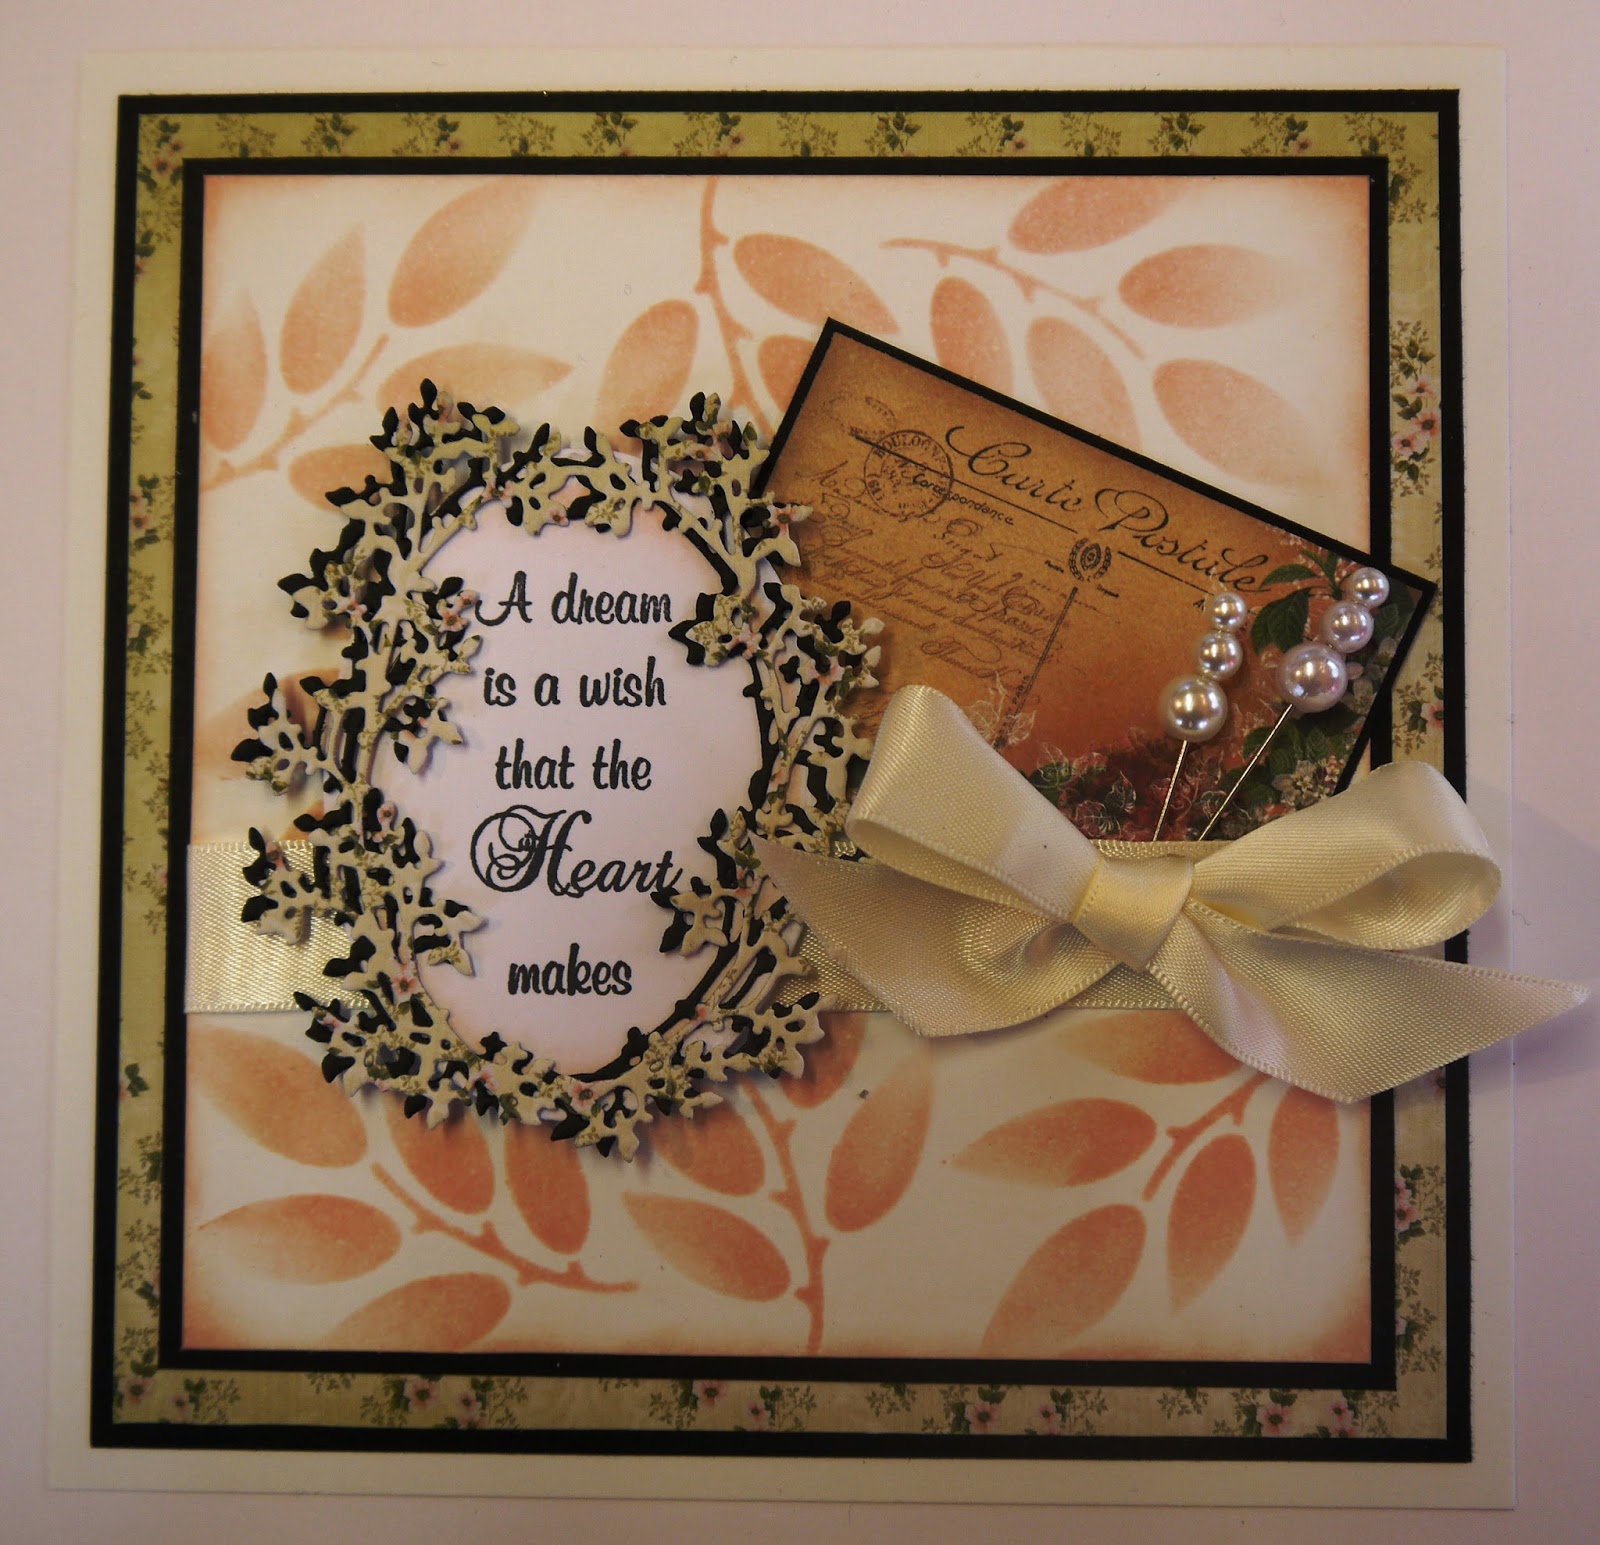
Stencil through the "Leafy" mask with Tattered Rose Distress Ink and trim to size.
Lightly distress around the edges with the same ink.
Die cut the Couture Creations Classic Vine from the Vintage Rose Collection in black Foundations card and again from Couture Creations Vintage Rose Garden 6x6 paper pad.
Glue them together off centre so that there is a shadow effect.
Stamp the sentiment from the A5 Dandelion Wishes stamp set onto Coconut White Card with Black Archival Ink.
Cut out with Spellbinders Classic Oval Large Dies.
Glue the vine into position.
Attach a length of Creative Expressions Finishing Touches 6mm Satin Ribbon to the Leafy background.
Matt and layer onto black card.
Glue onto a piece of the Couture Creations patterned paper, then matt onto black card before gluing onto the blank card.
Cut out one of the postcard images from the same papers and glue into position.
Add the oval topper with 3d foam pads.
Tie a bow from the same ribbon and attach with a glue dot.
Add 2 stick pins to finish.
And there we have it! Simple but elegant.
Everything used to make the card has come from Creative Expressions
I hope you like this weeks card...I've been working on next weeks project and it uses the last die that I was sent to work with. I'm very excited about how it's coming together!!!!
Well, that's it for this week. Many thanks for visiting and the comments.
Until next time, have a happy, crafty week!
Good Morning All and a Very Happy Tuesday!
Well, another week has flown by. Hope you all had a very happy Mothering Sunday and were spoiled rotten!
Todays card is one that I was really pleased with. I've used the Couture Creations Ornamental Lace Dies "Touch of Love" for the main focal point and everything used is from Creative Expressions.
So, let's get started.....
Emboss a piece of Coconut White Card with the A4 Rambling Blossoms Folder.
Highlight the raised areas with Shabby Shutters Distress Ink.
Matt and layer onto Black Foundations Card.
Did Cut 4 hearts using the Couture Creations Die from 2 different co-ordinating papers. I've used paper from the 6x6 Couture Creations Vintage Rose Garden Pad.
Glue onto the background with Cosmic Shimmer Dries Clear Glue.
Cut out a sentiment from the same paper pad. Matt and layer onto white card then attach to the centre of the hearts with 3d foam pads. Stick onto the main card.
Add dots of Cosmic Shimmer Pastel Green PVA Glue around the edges to finish. I've done mine quite randomly and different sizes.
And there's the finished card!
I hope you like it. The greens are just right for Spring and with a different sentiment it would make a gorgeous wedding card (or even with the same sentiment).
I've really enjoyed playing with these dies. They cut beautifully and with the brush tool from Spellbinders, they release really easily.
Well, that's it for this week. Many thanks for visiting and leaving comments.
So, until next time, have a happy, crafty week!
Good Morning All and a very Happy Tuesday!
Have you seen the blog challenge running on the Creative Expressions site, if not, pop over there and take a look. As it's Easter themed, the design team were asked to come up with an Easter card to give you some ideas so here's mine!
Stamp the chick from the A5 UMChick set of stamps with Black Archival Ink onto Coconut White Card.
Paint the chick with Sunshine Yellow and Sunset Orange Adirondack Inks.
Stamp again onto Couture Creations 6x6 paper from the Vintage Rose Garden Pad.
Cut out the egg parts and glue onto the 1st stamped image.
Cut out using the Spellbinders Classic Oval Large Dies.
Cut a matt from the paper pad with the Spellbinders Classic Oval Scalloped Dies.
Glue together.
Ink up the Daisy stamps from the A5 Bunnies set (UMBunnies) with Dandelion Archival Ink. Stamp onto a piece of white card for the background.
Cut 2 strips of co-ordinating papers from the pad and glue into position just under the daisies.
Before matting and layering onto patterned paper (spot the deliberate mistake!) mask off the bottom edge of the strip of paper and stamp the flower heads.
I've had to mask off a larger area as I matted and layered..oops!
Now matt and layer onto a piece of patterned paper!!!
Decide where the chick is going and before sticking down, stamp the sentiment from the Chick set. The sentiment is one stamp so I inked up the first word, stamped it then repeated with the 2nd word.
Glue the chick into position and add 3mm faux pearls to the flower centres and 5mm ones to the edges of the strip of paper.
And there's the finished card....I hope it's given you a few ideas for the challenge.
Everything used for this card is from Creative Expressions.
Once again, many thanks for visiting and leaving comments. They are much appreciated.
So, until next time, have a happy, crafty week!
Good Morning All and a very Happy Tuesday!
This is going to come as a shock, I've made a whole card without stamping or getting any ink out!!! Unheard of!!!
This weeks card for Creative Expressions has been made with some gorgeous papers I was sent to play with. They're from Couture Creations and come in a 6x6 pad called "Vintage Rose Garden ".
So let's start....
Cover a card with paper from the Couture Creations Pad leaving a small border around the edges.
Cut a strip of co-ordinating paper from the same pad and use it to make a pocket at the bottom of the card by gluing on 3 sides.
Use the Couture Creations "Touch of Love" Ornamental Lace die to cut a heart from white card.
Cut one more from patterned paper.
Glue the hearts together slightly off-setting them.
Glue into place on the card leaving the bottom of the heart free.
In the pad there are papers with postcards and stamps.
Cut out the postcards and arrange them in to pocket at the bottom of the card.
From the same piece of paper, cut out the stamps.
Glue some into position and add the rest with 3d foam pads.
Tie a bow from White Seam Binding and attach to the card.
Add some 3mm self adhesive pearls to the heart to finish.
And there's the finished card! Hope you like it.
I would like to say a big thank you for all the lovely comments last week. It really makes doing this worthwhile if I know you're getting some ideas from the blog. Glad you can follow my instructions....my husband is convinced I speak "Pam". Luckily, he's quite fluent in it!
Well, that's all for this week except to say that Creative Expressions has started a blog challenge so do pop over to their website for a look. The theme is Easter and that's what I'll be doing next week!
Until then, have a happy, crafty week!