Good Morning All and a very Happy Thursday and a Very Happy December!
I'm still bobbing around the Caribbean but made a few quick cards to tide you over until I get back!
Unfortunately, I don't have step by step photos for this one, but it should be easy to follow.
Die cut a square of Silver Mirror card using the large Noble Pierced Square Dies.
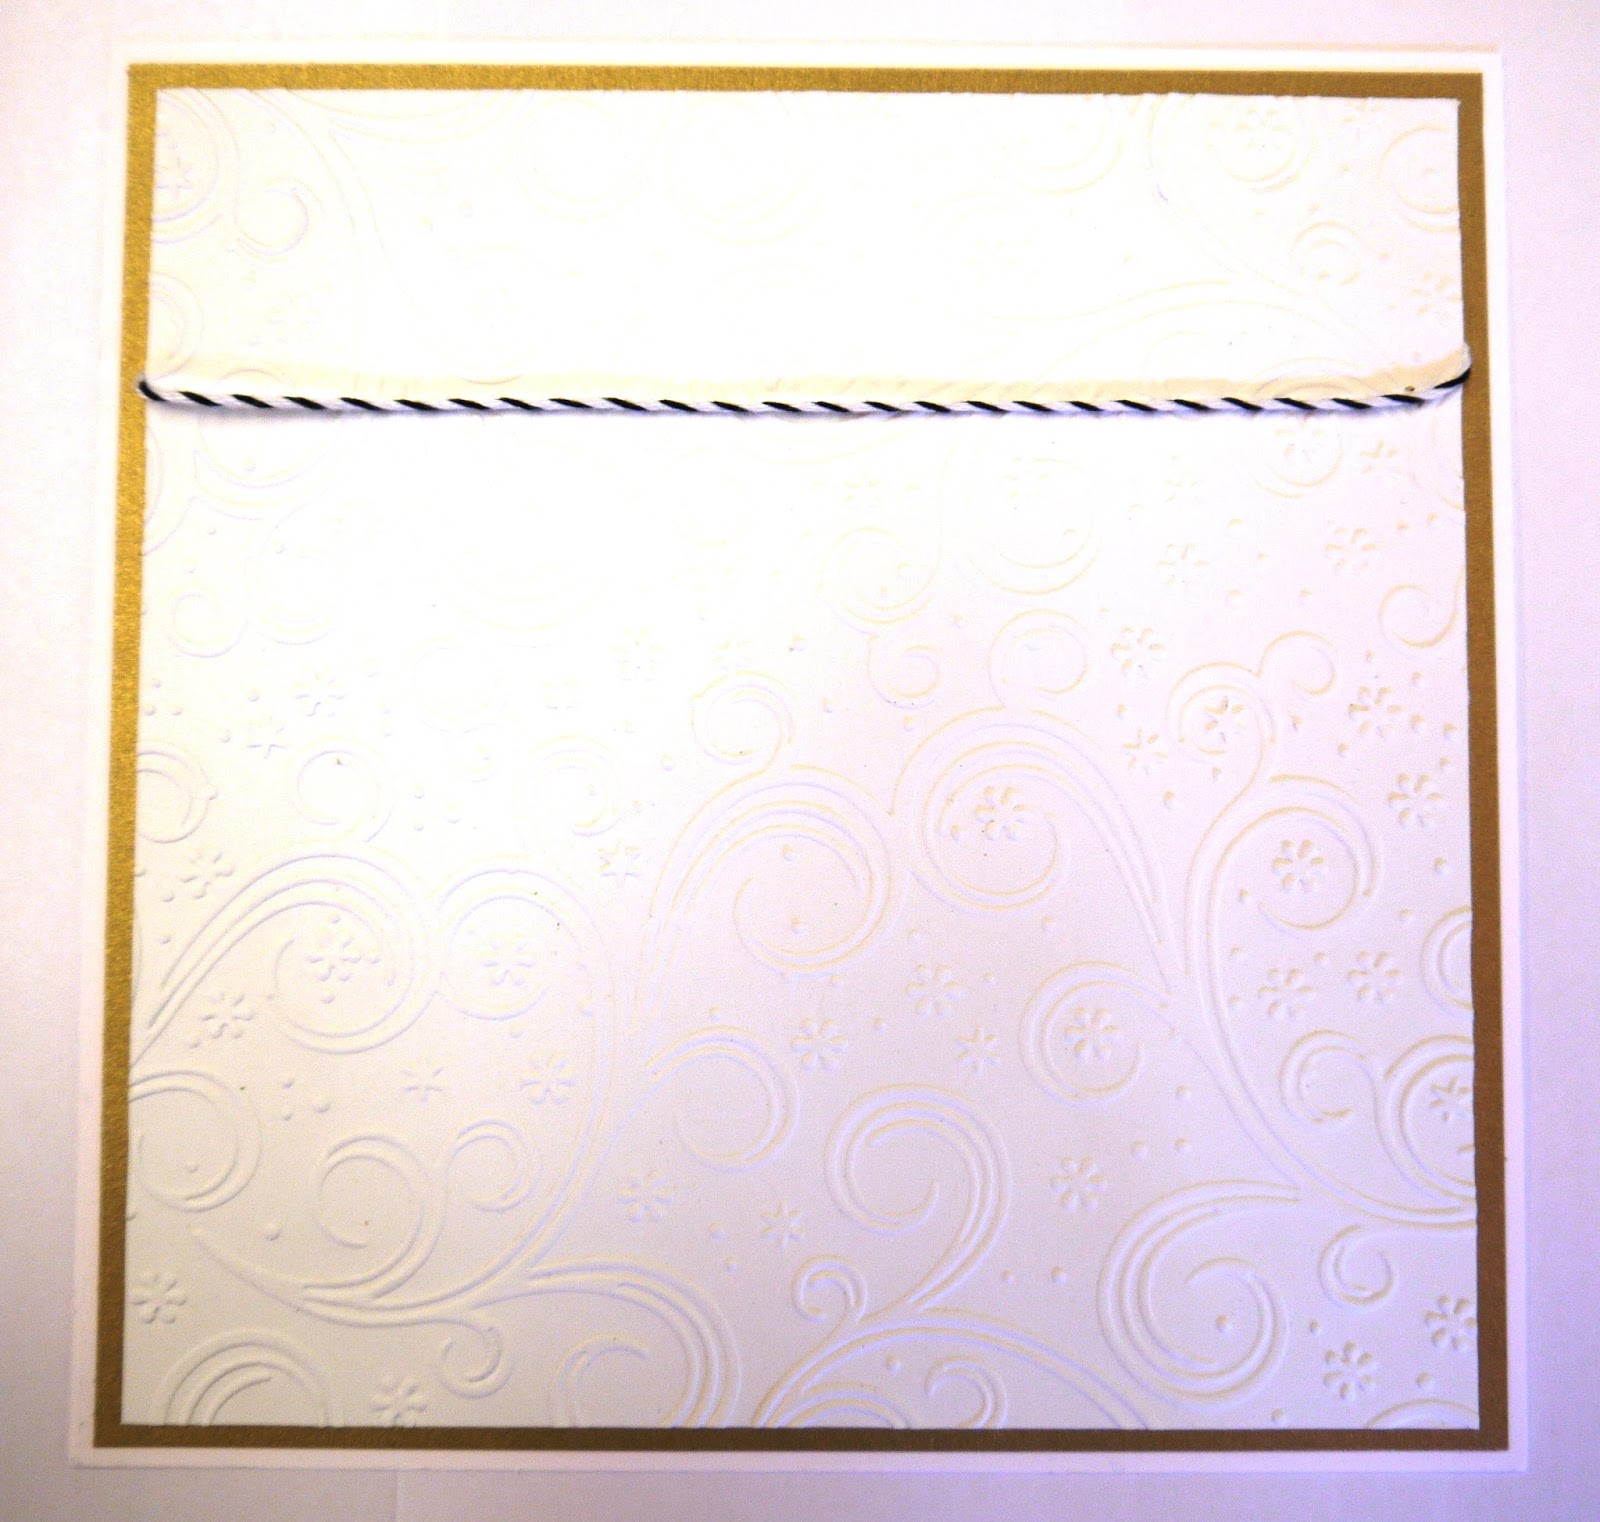
Cut a smaller square of Coconut White card and emboss with the A4 Twinkle, Twinkle Folder.
Pick up some Flake and Glitter glue on a piece of Cut 'n Dry Foam and dab over the embossed card.
Sprinkle Cosmic Shimmer Diamond Snow Glitter Jewels over it.
Matt and layer onto the gold card.
Place a piece of Double Sided Adhesive onto some white card.
Die cut the Festive Collection - Christmas Tree Greeting.
Carefully peel back the protective layer from the double sided adhesive from the base up to the top of the word "Christmas".
Sprinkle Cosmic Shimmer Polished Silk Glitters on.
Peel back to the top of the next word and apply a different colour glitter.
Keep going until you've covered it all. I've used a mix of blues and purples.
Glue the tree onto the embossed background and add a star embellishment.
And that's all you need to do!
The good thing is that it's flat so easy to post! It's also handy to be able to make your own glittered, embossed backgrounds!
Everything used (except for the silver card) is from Creative Expressions.
Well, that's it for this week. I'll be back next Thursday with another card. Many thanks for stopping by and leaving comments...always much appreciated.
Until next time, have a happy, crafty week!
About Me
- The Taming of the Glue
- Hi, I'm Pam and thank you for visiting my blog. I have been making cards for over 10 years and am an independent demonstrator for Creative Expressions. I am lucky enough to teach on cruise ships and also get the chance to demo at The Big Stamping and Scrapbooking Show at Alexander Palace. I run workshops for a local craft shop and if anyone would like details of the them please e-mail me at stephen.smith870@ntlworld.com I love to scrapbook but my all time favourite thing is to get messy with ink!
Showing posts with label Coconut White Cardstock. Show all posts
Thursday, 3 December 2015
Thursday, 26 November 2015
Holly Trees
Good Morning All and a very Happy Thursday.
I've got another Christmas card for you this week that's quick to make and another way to use your Festive Collection - Christmas Joy Wreath Dies.
So let's get started.....
In the Die set, there are 2 holly dies, one is the main background die and the other is the overlay.
Die the cut the background holly using Foundations card Brunswick Green and the overlay from Foundations Ruby Card.
Cut 6 of these and glue together with Cosmic Shimmer Dries Clear Glue.
Glue the bottom layer of wreaths into position on a square of Coconut White Card. Slightly overlap the wreaths.
Add the next two rows still overlapping.
Cut a tree pot from a piece of the Ruby card. Add a strip of Brunswick Green across it.
Glue underneath the tree.
Emboss a larger square of Coconut White with the A4 Tied Holly Folder.
Matt and layer onto the Green and Ruby card.
Add the main image onto the card.
Die cut a bow using the Finishing Touches - Classic 3D Itty Bitty Bows from the same green card. Glue into shape then glue onto the pot.
Add a small Black Dazzler to the centre of the bow.
Ink up the Noel stamp from the Holly Wreath Elements Stamp Set with Black Archival Ink. Stamp onto Coconut White card. Heat emboss with Cosmic Shimmer Clear Powder.
Cut to size then matt and layer as before. Add to the card with 3d foam pads.
And there's the finished card! Hope you like it! The size of the blank card is 8x8.
While you're reading this, I'll be working on a ship in the Caribbean, in fact I'll be there until January 4th. I do have projects lined up for while I'm away so please stop by and take a look.
I'll be posting photos on Facebook of our travels and checking in on there, to let people know where we are. If you want to see, please add me as a friend...my name on there is Pam Smith.
Many thanks for stopping by and leaving comments. Everything used is from Creative Expressions.
Until next time, have a happy, crafty week!
I've got another Christmas card for you this week that's quick to make and another way to use your Festive Collection - Christmas Joy Wreath Dies.
So let's get started.....
In the Die set, there are 2 holly dies, one is the main background die and the other is the overlay.
Die the cut the background holly using Foundations card Brunswick Green and the overlay from Foundations Ruby Card.
Cut 6 of these and glue together with Cosmic Shimmer Dries Clear Glue.
Glue the bottom layer of wreaths into position on a square of Coconut White Card. Slightly overlap the wreaths.
Add the next two rows still overlapping.
Cut a tree pot from a piece of the Ruby card. Add a strip of Brunswick Green across it.
Glue underneath the tree.
Emboss a larger square of Coconut White with the A4 Tied Holly Folder.
Matt and layer onto the Green and Ruby card.
Add the main image onto the card.
Die cut a bow using the Finishing Touches - Classic 3D Itty Bitty Bows from the same green card. Glue into shape then glue onto the pot.
Add a small Black Dazzler to the centre of the bow.
Ink up the Noel stamp from the Holly Wreath Elements Stamp Set with Black Archival Ink. Stamp onto Coconut White card. Heat emboss with Cosmic Shimmer Clear Powder.
Cut to size then matt and layer as before. Add to the card with 3d foam pads.
And there's the finished card! Hope you like it! The size of the blank card is 8x8.
While you're reading this, I'll be working on a ship in the Caribbean, in fact I'll be there until January 4th. I do have projects lined up for while I'm away so please stop by and take a look.
I'll be posting photos on Facebook of our travels and checking in on there, to let people know where we are. If you want to see, please add me as a friend...my name on there is Pam Smith.
Many thanks for stopping by and leaving comments. Everything used is from Creative Expressions.
Until next time, have a happy, crafty week!
Thursday, 12 November 2015
Frosted Trees
Good Morning All and a very Happy Thursday!
I've got another Christmas card to show you today that uses the Frosty Mini Background Die and glitter. If you can't use glitter this time of year, when can you!
Anyway, let's get started....
Die cut the Festive Collection - Frosty Mini Background from Coconut White Card.
Cut around the sides to make a rectangle.
Very strange light in the studio...but this is white...promise!
Apply some Flake and Glitter Glue to a piece of Cut 'n Dry Foam and dab over the die cut background.
Apply Cosmic Shimmer Glitter Jewels - Diamond Snow.
Place a piece of Double Sided Adhesive Sheet onto a piece of card.
Cover with Cosmic Shimmer Polished Silk Glitter - Ice Blue.
Cut to size and glue the die cut background over the top.
Emboss a piece of Coconut White card with the A4 Holly Lattice Embossing Folder.
Matt and layer onto a piece of Foundations Teal Card.
Attach the glittered background.
Die cut 3 trees from the Festive Collection - Winter Trees set and cover with the same Ice Blue Glitter as before.
Glue the first tree into position, flat, then add the others with 3d foam pads.
Place some double sided adhesive onto a piece of card then cut around the outer edge of the largest flag from the Frames and Tags - Pierced Flags. Cover with Ice Blue Glitter.
Die cut the same Pierced Flag using Coconut White card. Stamp the sentiment with Black Archival Ink then heat emboss with Cosmic Shimmer Clear Powder.
Matt and layer. Shape the flag and glue into position.
Add gems from the Always and Forever Wedding Collection - Rhinestones to the flag and some of the snowflake centres on the background.
And there's the finished card!
I'm afraid it's another one where I wish you could see it instead of a photo of it! Anyway, I hope you like it!
Well, that just leaves me to say a big thank you for visiting and leaving comments....all much appreciated.
Everything I've used is from Creative Expressions as always!
Until next time. have a happy, crafty week!
I've got another Christmas card to show you today that uses the Frosty Mini Background Die and glitter. If you can't use glitter this time of year, when can you!
Anyway, let's get started....
Die cut the Festive Collection - Frosty Mini Background from Coconut White Card.
Cut around the sides to make a rectangle.
Very strange light in the studio...but this is white...promise!
Apply some Flake and Glitter Glue to a piece of Cut 'n Dry Foam and dab over the die cut background.
Apply Cosmic Shimmer Glitter Jewels - Diamond Snow.
Place a piece of Double Sided Adhesive Sheet onto a piece of card.
Cover with Cosmic Shimmer Polished Silk Glitter - Ice Blue.
Cut to size and glue the die cut background over the top.
Emboss a piece of Coconut White card with the A4 Holly Lattice Embossing Folder.
Matt and layer onto a piece of Foundations Teal Card.
Attach the glittered background.
Die cut 3 trees from the Festive Collection - Winter Trees set and cover with the same Ice Blue Glitter as before.
Glue the first tree into position, flat, then add the others with 3d foam pads.
Place some double sided adhesive onto a piece of card then cut around the outer edge of the largest flag from the Frames and Tags - Pierced Flags. Cover with Ice Blue Glitter.
Die cut the same Pierced Flag using Coconut White card. Stamp the sentiment with Black Archival Ink then heat emboss with Cosmic Shimmer Clear Powder.
Matt and layer. Shape the flag and glue into position.
Add gems from the Always and Forever Wedding Collection - Rhinestones to the flag and some of the snowflake centres on the background.
And there's the finished card!
I'm afraid it's another one where I wish you could see it instead of a photo of it! Anyway, I hope you like it!
Well, that just leaves me to say a big thank you for visiting and leaving comments....all much appreciated.
Everything I've used is from Creative Expressions as always!
Until next time. have a happy, crafty week!
Thursday, 5 November 2015
JOY!
Good Morning and a very Happy Thursday to you all!
A new month and a new set of goodies to play with! This month we're back to Christmas designs and to kick things off I've used the Festive Collection-Christmas Joy Wreath as the main element.
So let's get started.....
Cut a square of Foundations Ruby Card and a smaller square of Coconut White Card.
Ink up the Elegant Poinsettias stamp with Vermillion Archival and stamp randomly onto the white card.
De-boss the card using the A4 Holly Lattice Embossing Folder.
Emboss the Ruby card with the same folder. Matt and layer.
Die cut a matt from the Ruby card with the Portuguese Collection - Lisbon Dies and emboss with the Holly Folder.
Die cut the Festive Collection - Christmas Joy Wreath from Coconut White card. Cut the outline leaves from the Ruby card.
Glue the letters onto the die cut matt with Cosmic Shimmer Dries Clear Glue.
Add to the card with 3d foam pads.
Add Always and Forever - Wedding Collection small gems to the holly die and also to the centres of the stamped flowers.
Cut a length of Black and White Tulle. Lay them on top of each other and pleat fold them. Tie a knot in the centre and fan out the ends.
Attach to the card with a glue dot.
Add a Dazzler to the centre with a glue dot to finish.
And there's the finished card!
It's a quick and easy one to make and would be great for a male or female recipient. I hope you like it! I've used an 8x8 card for the base.
Well, that's it for this week. Many thanks for all the visits and kind comments.
I'll be back next week with another Christmas design. In the meantime, I'll be teaching at Martells this Saturday and, for anyone coming, it involves glitter so be warned!!!
Until next time, have a happy, crafty week!
A new month and a new set of goodies to play with! This month we're back to Christmas designs and to kick things off I've used the Festive Collection-Christmas Joy Wreath as the main element.
So let's get started.....
Cut a square of Foundations Ruby Card and a smaller square of Coconut White Card.
Ink up the Elegant Poinsettias stamp with Vermillion Archival and stamp randomly onto the white card.
De-boss the card using the A4 Holly Lattice Embossing Folder.
Emboss the Ruby card with the same folder. Matt and layer.
Die cut a matt from the Ruby card with the Portuguese Collection - Lisbon Dies and emboss with the Holly Folder.
Die cut the Festive Collection - Christmas Joy Wreath from Coconut White card. Cut the outline leaves from the Ruby card.
Glue the letters onto the die cut matt with Cosmic Shimmer Dries Clear Glue.
Add to the card with 3d foam pads.
Add Always and Forever - Wedding Collection small gems to the holly die and also to the centres of the stamped flowers.
Cut a length of Black and White Tulle. Lay them on top of each other and pleat fold them. Tie a knot in the centre and fan out the ends.
Attach to the card with a glue dot.
Add a Dazzler to the centre with a glue dot to finish.
And there's the finished card!
It's a quick and easy one to make and would be great for a male or female recipient. I hope you like it! I've used an 8x8 card for the base.
Well, that's it for this week. Many thanks for all the visits and kind comments.
I'll be back next week with another Christmas design. In the meantime, I'll be teaching at Martells this Saturday and, for anyone coming, it involves glitter so be warned!!!
Until next time, have a happy, crafty week!
Thursday, 15 October 2015
In Love With These Papers!!!
Good Morning All and a Very Happy Thursday!
I'm back from the dig and a fabulous ukulele festival and ready to craft again!
This week I've used more of the gorgeous Craft Consortium 12x12 patterned papers....I can't get enough of them! Anyway, here goes with this weeks project....
Emboss a piece of Coconut White Card using the Rambling Blossoms A4 Folder.
Matt and layer onto Foundations Rich Plum Card.
Die cut the Eternal Rings Striplet Die from a piece of Coconut White card.
Cut a piece of the 12x12 Bloom Beautiful Paper 1cm larger than the striplet.
Cover the paper with Creative Expressions Double Sided Adhesive.
Remove the backing and apply Cosmic Shimmer Diamond Snow Glitter Jewels.
Matt and layer onto white and plum card.
Add the die cut over the top with 3d foam pads.
Glue into position on the card.
Add 5mm self adhesive pearls to the die cut.
Ink up the sentiment from the A5 British Wild Flower stamp set with Black Archival Ink and stamp onto Coconut White card. Heat emboss with Cosmic Shimmer Clear Powder.
Matt and layer as before.
Attach to the card with 3d foam pads.
Die cut 2 Finishing Touches-Magical Butterflies from the same patterned paper.
Shape the wings and glue into position.
And there's the finished card. I hope you like it!
I really cannot stress how beautiful these papers are and the quality is first class. As a bonus, they are all double sided!!
Anyway, everything used is from Creative Expressions as always.
I just want to say thank you for the birthday wishes and leaving your comments...much appreciated.
I'll be back next Thursday with another project so until then, have a happy, crafty week!
I'm back from the dig and a fabulous ukulele festival and ready to craft again!
This week I've used more of the gorgeous Craft Consortium 12x12 patterned papers....I can't get enough of them! Anyway, here goes with this weeks project....
Emboss a piece of Coconut White Card using the Rambling Blossoms A4 Folder.
Matt and layer onto Foundations Rich Plum Card.
Die cut the Eternal Rings Striplet Die from a piece of Coconut White card.
Cut a piece of the 12x12 Bloom Beautiful Paper 1cm larger than the striplet.
Cover the paper with Creative Expressions Double Sided Adhesive.
Remove the backing and apply Cosmic Shimmer Diamond Snow Glitter Jewels.
Matt and layer onto white and plum card.
Add the die cut over the top with 3d foam pads.
Glue into position on the card.
Ink up the sentiment from the A5 British Wild Flower stamp set with Black Archival Ink and stamp onto Coconut White card. Heat emboss with Cosmic Shimmer Clear Powder.
Matt and layer as before.
Attach to the card with 3d foam pads.
Die cut 2 Finishing Touches-Magical Butterflies from the same patterned paper.
Shape the wings and glue into position.
And there's the finished card. I hope you like it!
I really cannot stress how beautiful these papers are and the quality is first class. As a bonus, they are all double sided!!
Anyway, everything used is from Creative Expressions as always.
I just want to say thank you for the birthday wishes and leaving your comments...much appreciated.
I'll be back next Thursday with another project so until then, have a happy, crafty week!
Thursday, 1 October 2015
New Month.....New Goodies!
Good Morning All and a very Happy Thursday and pinch, punch, the 1st of the month!
As it's a new month, I've been sent new goodies to play with so without further ado...let's get started!!!
Cut 2 different sized squares of Craft Consortium Bloom Beautiful 12x12 paper.
Cut 2 squares of Coconut White Card using the Noble-Double Pierced Squares Dies.
Stamp the sentiment from Delightful Sentiments stamp set onto the smaller square of white card with Black Archival Ink. Heat emboss with Cosmic Shimmer Clear Powder.
Matt and layer all of the components.
As it's a new month, I've been sent new goodies to play with so without further ado...let's get started!!!
Cut 2 different sized squares of Craft Consortium Bloom Beautiful 12x12 paper.
Cut 2 squares of Coconut White Card using the Noble-Double Pierced Squares Dies.
Stamp the sentiment from Delightful Sentiments stamp set onto the smaller square of white card with Black Archival Ink. Heat emboss with Cosmic Shimmer Clear Powder.
Matt and layer all of the components.
Cut out the flowers with the
Finishing Touches-Camellia Complete Petals Die Set using the same papers as before.
Shape and make up into 3d flowers. Glue into position on the card.
Add 5 & 8mm white self adhesive pearls to the centres of the flowers.
Die cut one more flower (several layers) and some leaves to decorate the corners. Glue into position.
And there's the finished card!
As always, everything I've used is from Creative Expressions.
I really can't praise the new 12x12 papers enough. A lot of them have a sheen and some are glittered. It's an outstanding collection and I'm just glad there are 4 sheets of each design otherwise I'd have serious trouble cutting them up!
I do love the Noble dies as well. I've always had difficulty piercing around the edges but these have really solved the problem.
Well, that's it for this week. I'll be showing you more of these beautiful papers as the month goes on.
Many thanks for stopping by and leaving comments....they do mean a lot to me.
Until next time, have a happy, crafty week!
Thursday, 17 September 2015
Let Your Dreams Fly
Good Morning All and a very Happy Thursday!
I've been playing with the new Colour Cloud Blending Inks all week as I'll be giving a "Masterclass" Demo at Ally Pally on Saturday and Sunday. As I had them out, I thought I would use them for this weeks project and here it is....
So, let's get started!
Apply Plum Cobbler Colour Cloud Blending Ink to a Smoothie. Dab onto a butterfly stamp from the Butterfly Field Collection by Phill Martin.
Stamp onto Coconut White card then stamp again without re-inking. Repeat all the way around the edge of the card.
Matt and layer with Amethyst Foundation Card.
Cut a smaller square of Coconut White and stamp around the edges as before.
Ink up the sentiment from the same stamp set with Black Archival Ink. Stamp in the centre and heat emboss with Cosmic Shimmer Clear Powder.
Matt and layer with the Amethyst Card.
Cover a piece of Coconut White with the Plum Cobbler Ink, spritz with water then dab with a piece of kitchen towel. Dry thoroughly.
Die cut Butterflies using the Finishing Touches-Magical Butterflies Dies by Sue Wilson.
Die cut more butterflies using the papers in the Graceful Butterflies and Dragonflies Paper Pad.
Apply Blueberry Cosmic Shimmer Twinkles to the butterflies using your finger as an applicator!
When dry, shape the wings and glue into position on the card.
I've also added a little of the Twinkles around the edge...should have done that before matting and layering the background but only decided after seeing how pretty the butterflies were!
Anyway, hope you like it!
I have to say how impressed I am with the new inks and Smoothie Tools.....they blend beautifully and don't leave lines. I hope you'll be able to come to the demo area at Ally Pally and see them in action this weekend!
If I'm not in the demo area, I'll be on Sue Wilson's Rubbernecker Stand. It'd be lovely to say hello to you.
Well, that's it for this week...better start packing my bags for the weekend.
Just a reminder that everything used in this project is from Creative Expressions.
Many thanks for stopping by and leaving comments. Until next time, have a happy, crafty week!
I've been playing with the new Colour Cloud Blending Inks all week as I'll be giving a "Masterclass" Demo at Ally Pally on Saturday and Sunday. As I had them out, I thought I would use them for this weeks project and here it is....
So, let's get started!
Apply Plum Cobbler Colour Cloud Blending Ink to a Smoothie. Dab onto a butterfly stamp from the Butterfly Field Collection by Phill Martin.
Stamp onto Coconut White card then stamp again without re-inking. Repeat all the way around the edge of the card.
Matt and layer with Amethyst Foundation Card.
Cut a smaller square of Coconut White and stamp around the edges as before.
Ink up the sentiment from the same stamp set with Black Archival Ink. Stamp in the centre and heat emboss with Cosmic Shimmer Clear Powder.
Matt and layer with the Amethyst Card.
Cover a piece of Coconut White with the Plum Cobbler Ink, spritz with water then dab with a piece of kitchen towel. Dry thoroughly.
Die cut Butterflies using the Finishing Touches-Magical Butterflies Dies by Sue Wilson.
Die cut more butterflies using the papers in the Graceful Butterflies and Dragonflies Paper Pad.
Apply Blueberry Cosmic Shimmer Twinkles to the butterflies using your finger as an applicator!
When dry, shape the wings and glue into position on the card.
I've also added a little of the Twinkles around the edge...should have done that before matting and layering the background but only decided after seeing how pretty the butterflies were!
Anyway, hope you like it!
I have to say how impressed I am with the new inks and Smoothie Tools.....they blend beautifully and don't leave lines. I hope you'll be able to come to the demo area at Ally Pally and see them in action this weekend!
If I'm not in the demo area, I'll be on Sue Wilson's Rubbernecker Stand. It'd be lovely to say hello to you.
Well, that's it for this week...better start packing my bags for the weekend.
Just a reminder that everything used in this project is from Creative Expressions.
Many thanks for stopping by and leaving comments. Until next time, have a happy, crafty week!
Thursday, 10 September 2015
Say it with Flowers!
Good Morning All and a very Happy Thursday!
I thought that this week I'd do things a little differently and show you the finished card at the start of the step by step. Would you let me know if you prefer that to the reveal at the end?
Anyway, let's get started.....
Cut a square of paper from the Sentimentally Yours-Graceful Butterflies and Dragonflies paper pad designed by Phil Martin.
Apply Colour Cloud Plum Cobbler Blending Ink to a Smoothie and dab onto a butterfly stamp from the Butterfly Field Stamp Set.
Stamp directly onto the patterned paper and heat emboss with Cosmic Shimmer Cleat Powder.
Die the the Finishing Touches-Ornamental Corners from coordinating paper, glue into position and trim off any excess.
Matt and layer onto Coconut White card and the same paper as before.
Ink up the sentiment from the same stamp set withBlack Archival Ink and stamp onto Coconut White card. Heat emboss with clear powder.
Cut out using Californian Collection-Decorative Frames Set B.
Cut a matt from the patterned paper using Californian Collection-Decorative Frames Set A.
Cut a slightly larger one in white then matt and layer.
Attach to the card with 3d foam pads.
Rough cut some circles from the patterned paper pad. Cut a spiral into them.
Roll up from the outside edge and glue to the middle to form a flower. Apply some of the Blending Ink around the edges for definition.
Cut some Ivy using the Finishing Touches-Trailing Ivy dies from white card.
Glue into position on the card then glue the flowers on to finish.
And there's the finished card again!
I hope you like it!
That's it for this week. I'm off to prep my demos for Ally Pally, hope to see some of you there next week! Many thanks for visiting and leaving comments. Until next time, have a happy, crafty week!
I thought that this week I'd do things a little differently and show you the finished card at the start of the step by step. Would you let me know if you prefer that to the reveal at the end?
Anyway, let's get started.....
Cut a square of paper from the Sentimentally Yours-Graceful Butterflies and Dragonflies paper pad designed by Phil Martin.
Apply Colour Cloud Plum Cobbler Blending Ink to a Smoothie and dab onto a butterfly stamp from the Butterfly Field Stamp Set.
Stamp directly onto the patterned paper and heat emboss with Cosmic Shimmer Cleat Powder.
Die the the Finishing Touches-Ornamental Corners from coordinating paper, glue into position and trim off any excess.
Matt and layer onto Coconut White card and the same paper as before.
Ink up the sentiment from the same stamp set withBlack Archival Ink and stamp onto Coconut White card. Heat emboss with clear powder.
Cut out using Californian Collection-Decorative Frames Set B.
Cut a matt from the patterned paper using Californian Collection-Decorative Frames Set A.
Cut a slightly larger one in white then matt and layer.
Attach to the card with 3d foam pads.
Rough cut some circles from the patterned paper pad. Cut a spiral into them.
Roll up from the outside edge and glue to the middle to form a flower. Apply some of the Blending Ink around the edges for definition.
Cut some Ivy using the Finishing Touches-Trailing Ivy dies from white card.
Glue into position on the card then glue the flowers on to finish.
And there's the finished card again!
I hope you like it!
That's it for this week. I'm off to prep my demos for Ally Pally, hope to see some of you there next week! Many thanks for visiting and leaving comments. Until next time, have a happy, crafty week!
Thursday, 27 August 2015
A Really Quick One!
Good Morning All and a very Happy Thursday!
I know how many Christmas cards we need to make and with that in mind, I thought I'd show you a really quick and easy one this week.
So, let's get started.....
Cut a square of Coconut White card to size and emboss with the A4 Tied Holly Folder.
Matt and layer onto Foundations Ruby Card.
Ink up the 2 Turtle Doves from the John Lockwood 12 Days of Christmas stamp set with Perfect Medium Ink. Stamp onto Coconut White card 3 times and heat emboss with Cosmic Shimmer Bright Metallic Gold Powder.
Cut out then matt and layer into squares of the Ruby card.
Attach to the main card with 3d foam pads.
Die cut the Festive Collection-Dove of Peace twice, one in white card and one in Ruby.
Ink up the tree from the 12 Days of Christmas-Partridge in a Pear Tree set of stamps with Perfect Medium and stamp over the white Dove. Heat emboss with the gold powder.
Glue the ruby dove into position then add the white one, slightly offset, with 3d foam pads.
And there's the finished card!
It would look lovely with blue card and silver embossing powder as well. I think it's a handy card for batch card making, hope you agree!
Well, that's all for this week....I'm going non-Christmassy next week!
Don't forget to watch the new craft channel with John Lockwood, Julia Watts and all your favourites!
Until next time, have a happy, crafty week!
I know how many Christmas cards we need to make and with that in mind, I thought I'd show you a really quick and easy one this week.
So, let's get started.....
Cut a square of Coconut White card to size and emboss with the A4 Tied Holly Folder.
Matt and layer onto Foundations Ruby Card.
Ink up the 2 Turtle Doves from the John Lockwood 12 Days of Christmas stamp set with Perfect Medium Ink. Stamp onto Coconut White card 3 times and heat emboss with Cosmic Shimmer Bright Metallic Gold Powder.
Cut out then matt and layer into squares of the Ruby card.
Attach to the main card with 3d foam pads.
Die cut the Festive Collection-Dove of Peace twice, one in white card and one in Ruby.
Ink up the tree from the 12 Days of Christmas-Partridge in a Pear Tree set of stamps with Perfect Medium and stamp over the white Dove. Heat emboss with the gold powder.
Glue the ruby dove into position then add the white one, slightly offset, with 3d foam pads.
And there's the finished card!
It would look lovely with blue card and silver embossing powder as well. I think it's a handy card for batch card making, hope you agree!
Well, that's all for this week....I'm going non-Christmassy next week!
Don't forget to watch the new craft channel with John Lockwood, Julia Watts and all your favourites!
Until next time, have a happy, crafty week!
Thursday, 16 July 2015
Joy!
Good Morning All and a very Happy Thursday!
While you're reading this, I'll be away at a music festival being an ageing hippy! It's a lovely festival near Shaftesbury in Dorset called The Larmer Tree and this year Tom Jones is headlining...i will not be throwing undies at the stage!
Anyway, back to this weeks project for Creative Expressions...
Emboss a piece of Coconut White Card with the A4 Frosty Swirls Folder.
Attach a length of Black/White Bakers Twine before matting and layering onto Foundations Vintage Gold Card.
Die cut 3 Festive Collection-Sentimental Baubles from the Gold card. Emboss them using the same folder. Highlight the raised areas with Cosmic Shimmer Decadent Wine Gilding Wax.
Glue the 2 outer baubles into position and add the 3rd with 3d foam pads.
Cut a strip of the Vintage Gold Card. Cut a thinner strip of White card and emboss with the same folder. Matt and layer.
Using the same die set, cut out the word "Joy"
Glue the strip onto the card and add the word with 3d pads.
Tie 3 bows from Gold Tulle and glue above the baubles.
Add Dazzlers to finish.
And here's the finished card!
It's another quick one to make....always important at Christmas when quite often, we have a lot to make!
Well, that's it for this week. Many thanks for stopping by and leaving comments...always appreciated.
I'll be back next Thursday with another Christmas project so until then, have a happy, crafty week.
While you're reading this, I'll be away at a music festival being an ageing hippy! It's a lovely festival near Shaftesbury in Dorset called The Larmer Tree and this year Tom Jones is headlining...i will not be throwing undies at the stage!
Anyway, back to this weeks project for Creative Expressions...
Emboss a piece of Coconut White Card with the A4 Frosty Swirls Folder.
Attach a length of Black/White Bakers Twine before matting and layering onto Foundations Vintage Gold Card.
Die cut 3 Festive Collection-Sentimental Baubles from the Gold card. Emboss them using the same folder. Highlight the raised areas with Cosmic Shimmer Decadent Wine Gilding Wax.
Glue the 2 outer baubles into position and add the 3rd with 3d foam pads.
Cut a strip of the Vintage Gold Card. Cut a thinner strip of White card and emboss with the same folder. Matt and layer.
Using the same die set, cut out the word "Joy"
Glue the strip onto the card and add the word with 3d pads.
Tie 3 bows from Gold Tulle and glue above the baubles.
Add Dazzlers to finish.
And here's the finished card!
It's another quick one to make....always important at Christmas when quite often, we have a lot to make!
Well, that's it for this week. Many thanks for stopping by and leaving comments...always appreciated.
I'll be back next Thursday with another Christmas project so until then, have a happy, crafty week.
Thursday, 9 July 2015
Merry Christmas!
Good Morning All and a very Happy Thursday!
Still nice and warm for making Christmas Cards but I really enjoyed making this weeks project for Creative Expressions. When the Classic Poinsettia Dies first came out, I fell in love with them so it was a great excuse to get them back out and have a play!
Anyway, let's get on with the card.............
Emboss a square of Foundations Ruby Card with the A4 Frosty Swirls Folder.
Matt and layer onto Coconut white and Ruby before adding to the blank card.
Did cut both parts of the Italian Collection-Calabria from Coconut White Card.
Attach the outer ring to the card with 3d pads and glue the inner one into position.
Ink up the Elegant Poinsettias stamp with Perfect Medium and stamp onto Ruby Card. Heat emboss with Cosmic Shimmer True White. Cut out with the Festive Collection Classic Poinsettias Dies.
Shape the petals and glue together. Glue onto the outer circle.
Cut out some Festive Collection-Filigree Poinsettia flowers from Coconut White Card.
Die cut the Trailing Ivy from the same white card.
Glue into position on the card.
Ink up the sentiment (from the A5 Seasonal Snow set) using Black Archival Ink and stamp onto Coconut White Card. Heat emboss with Cosmic Shimmer Clear Powder.
Die cut with the Small Standard Circles. Cut a matt from the Ruby Card with the same dies. Attach to the card with 3d pads.
Just add some 8mm black pearls to the flower centres and you're finished!
Hope you like it!
Well, that's it for this week...I'll be back next Thursday with another Christmas project. I will pop on here Sunday to announce the winner of the wall hanging.
Many thanks for visiting and leaving comments. Would you like more giveaways of the samples I make, just let me know in the comments?
Until next time, have a happy, crafty week!
Still nice and warm for making Christmas Cards but I really enjoyed making this weeks project for Creative Expressions. When the Classic Poinsettia Dies first came out, I fell in love with them so it was a great excuse to get them back out and have a play!
Anyway, let's get on with the card.............
Emboss a square of Foundations Ruby Card with the A4 Frosty Swirls Folder.
Matt and layer onto Coconut white and Ruby before adding to the blank card.
Did cut both parts of the Italian Collection-Calabria from Coconut White Card.
Attach the outer ring to the card with 3d pads and glue the inner one into position.
Ink up the Elegant Poinsettias stamp with Perfect Medium and stamp onto Ruby Card. Heat emboss with Cosmic Shimmer True White. Cut out with the Festive Collection Classic Poinsettias Dies.
Shape the petals and glue together. Glue onto the outer circle.
Cut out some Festive Collection-Filigree Poinsettia flowers from Coconut White Card.
Die cut the Trailing Ivy from the same white card.
Glue into position on the card.
Ink up the sentiment (from the A5 Seasonal Snow set) using Black Archival Ink and stamp onto Coconut White Card. Heat emboss with Cosmic Shimmer Clear Powder.
Die cut with the Small Standard Circles. Cut a matt from the Ruby Card with the same dies. Attach to the card with 3d pads.
Just add some 8mm black pearls to the flower centres and you're finished!
Hope you like it!
Well, that's it for this week...I'll be back next Thursday with another Christmas project. I will pop on here Sunday to announce the winner of the wall hanging.
Many thanks for visiting and leaving comments. Would you like more giveaways of the samples I make, just let me know in the comments?
Until next time, have a happy, crafty week!
Subscribe to:
Posts (Atom)