Good Morning All and a very Happy Tuesday!
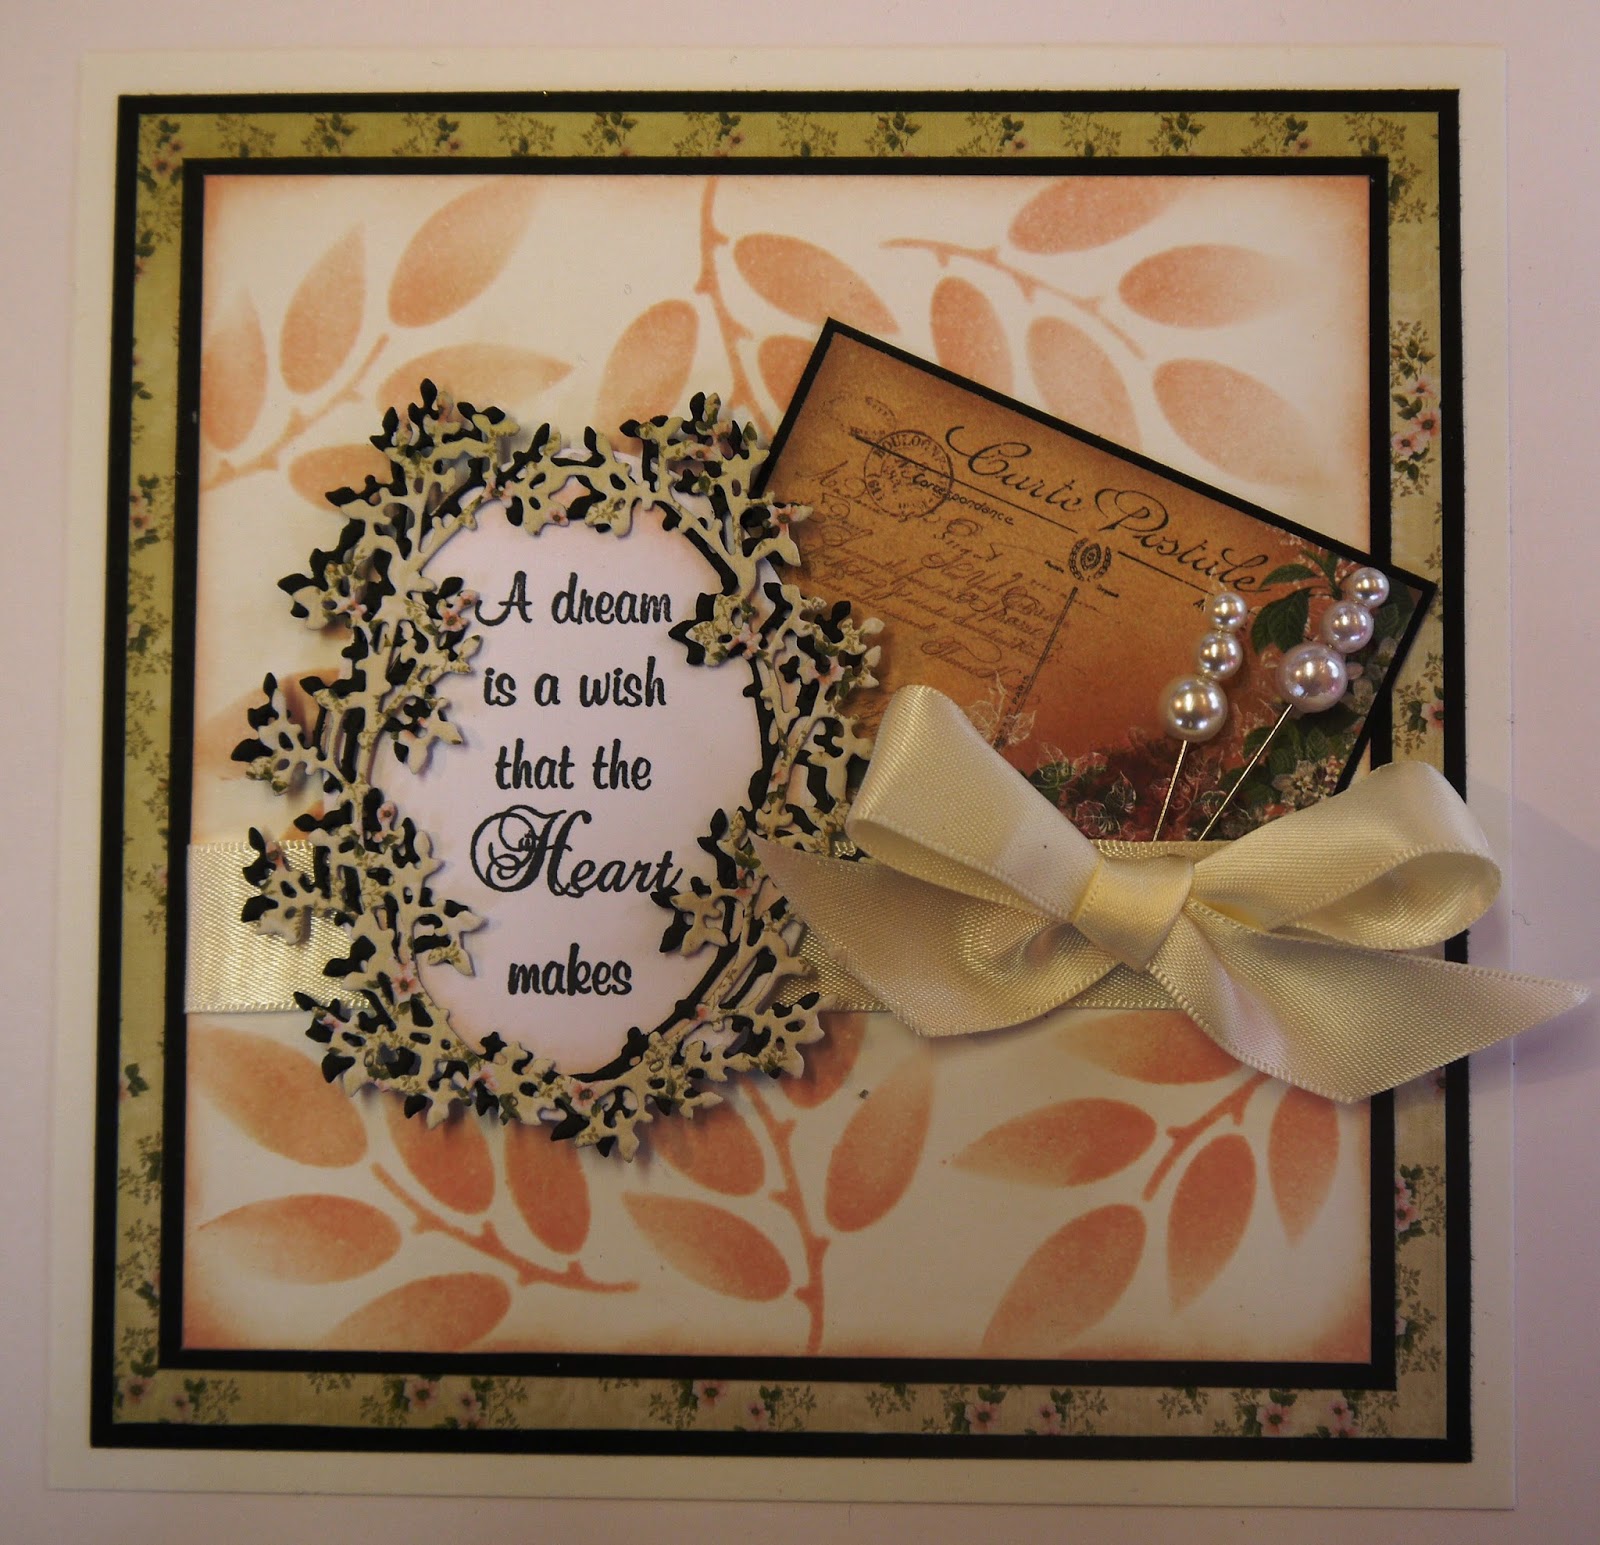
I'm still playing with the new Couture Creations Dies and having a ball! I love the fact that although they're very intricate, they cut beautifully and release so easily that I haven't even needed to use wax paper with them.
Anyway, on with this weeks project.
Stencil through the "Leafy" mask with Tattered Rose Distress Ink and trim to size.
Lightly distress around the edges with the same ink.
Die cut the Couture Creations Classic Vine from the Vintage Rose Collection in black Foundations card and again from Couture Creations Vintage Rose Garden 6x6 paper pad.
Glue them together off centre so that there is a shadow effect.
Stamp the sentiment from the A5 Dandelion Wishes stamp set onto Coconut White Card with Black Archival Ink.
Cut out with Spellbinders Classic Oval Large Dies.
Glue the vine into position.
Attach a length of Creative Expressions Finishing Touches 6mm Satin Ribbon to the Leafy background.
Matt and layer onto black card.
Glue onto a piece of the Couture Creations patterned paper, then matt onto black card before gluing onto the blank card.
Cut out one of the postcard images from the same papers and glue into position.
Add the oval topper with 3d foam pads.
Tie a bow from the same ribbon and attach with a glue dot.
Add 2 stick pins to finish.
And there we have it! Simple but elegant.
Everything used to make the card has come from Creative Expressions
I hope you like this weeks card...I've been working on next weeks project and it uses the last die that I was sent to work with. I'm very excited about how it's coming together!!!!
Well, that's it for this week. Many thanks for visiting and the comments.
Until next time, have a happy, crafty week!
Good Morning All and a very Happy Tuesday to everyone!
I'm a very lucky girl and received a package of new goodies from Creative Expressions to play with just before the New Year. So without further ado, here's one of the cards I made using the Basketweave Purse stamp from the Singles range.
Stamp the purse onto a piece of Tim Holtz Vintage Shabby Paper using Perfect Medium. Heat emboss with Cosmic Shimmer Silver Shine Metallic Powder and cut out.
Emboss a piece of Coconut White cardstock using the Creative Expressions A4 Basket weave folder and matt an layer onto some pink card.
Tear some different papers from the Tim Holtz Vintage Shabby collection and glue onto the card.
Die cut Majestic Labels 25 using Coconut White card. Glue into place and add the purse with 3d foam pads.
Stamp "Happy Birthday" from the same set using Perfect Medium and heat emboss as before. Cut out making a pennant shape. Attach with glue and foam pads after shaping it. Glue some Creative Expressions Pink Ribbon Roses into place and add 2 pearl Stick Pins and an 8mm pearl to finish.
It's a much "prettier" card than I usually make (no Distress Ink in sight!) but it would make a nice card for any age. I hope you like it.
The blog candy has been won by Angela Hartley, please contact me so that I can get it in the post to you.
I'm off on my travels again today but I'll be posting a project fro Creative Expressions every Tuesday while I'm away so please come back and take a look. Many thanks for your visit.
Until next time....keep crafting!
Good morning all and a very happy Tuesday. Well, this is exciting! My first "proper" post as a member of the Creative Expressions Design Team!
So without further ado, here is what I came up with using the new A5 stamp plate "Winter Flowers".
Stamp the Christmas Rose with black Archival Ink onto a piece of Coconut White card and heat emboss with Cosmic Shimmer Clear Embossing Powder.
Colour the flower with Cosmic Shimmer Drawing Inks. I've used Meadow Lush and Lime Burst for the leaves and Cosmic Skin and Pearl Shine for the flower heads. The centres have been painted with Rich Gold and Ancient Copper.
Die cut the picture using Spellbinders Labels 28. Using the same die, draw around the outer edge of it onto Green cardstock and cut out with scissors. This enables you to make a matt that is just the right size and also gives you more flexibility with the dies making them even better value for money!
Using the Dainty Dots M-Bossability Folder, emboss a piece of Coconut White Card. When using the Grand Calibur, make sutreere you use the Raspberry plate without the tan mat.
Use 3d foam pads to attach the flower panel to the card. To finish, tie a double bow and attach with a glue dot. Add a silver Dazzler to the centre of the bow. Use another glue dot to attach it after peeling off the 3d foam pad.
Stamp the sentiment with black Archival Ink and heat emboss as before. Cut it into a banner shape, matt and layer it onto green card. Gently bend the banner and stick to the card with glue at the ends and foam pads where the banner rises. Add a couple of Crystal Stick Pins to finish.
Well, that's the first of my DT pieces and I thoroughly enjoyed making it. It's a nice quick and effective card to make. The Drawing Inks are fantastic, lots of Mica to give shine and glimmer and also a very fine brush to paint with. The other great thing, if you're a bit clumsy like me, is that they are non-spill!!
You may have noticed that I have some blog candy on offer. To enter, all you have to do is sign up and follow. When I reach 300, I'll do the draw.
Hope you'll be back soon. Many thanks for visiting and please leave comments especially if there are any techniques you would like covered. Until next time......