Good Morning All and a very Happy Tuesday.
This week it's the last card using the Cats and Dogs stamps..very excited about the stamps for next month though!!!
This week is all about masking again but this time it's using the same stamp for multiple images. Let's get started!
Ink up "Willow" with Black Archival and stamp onto Coconut White Card. Heat emboss with Cosmic Shimmer Clear Powder.
Stamp again onto a sticky note, cut out and cover the original stamped image.
Stamp and emboss Willow to the right and left of the 1st image.
Make sure that when you stamp the 2nd and 3rd images they are slightly higher than the 1st one.
Paint the cats with Citrus, Watermelon and Sunset Orange and Sunrise Yellow Adirondack Inks.
Matt and layer onto Black Foundations Card.
Cut a triangle of Couture Creations Damask Delight Paper and glue onto a piece of Coconut White Card.
Stamp the sentiment around the 2 plain edges and once on the cat picture.
Matt and layer onto white and black card before adding the main image to the centre.
And there's the finished card! Hope you like it...I think it's got a real "spring-like" feel to it!
Well, that's it for this week. Many thanks for stopping by and leaving comments, they are much appreciated.
I'm off to play with my new stamps ready for next weeks blog so until then, have a happy, crafty week!
Good Morning All and a very Happy Tuesday!
As promised, I'm going to use Reverse Masking today to make a card using "Alfie", another Creative Expressions Singles Stamp.
Ink the stamp with Black Archival and stamp onto Coconut White Card.
Stamp again onto a piece of copier paper. Cut the dog out leaving a large area of paper around the cut out image.
Tape the paper over the stamped image.
Ink up the large dot Background Stamp with Saffron Archival and stamp over the masked image.
Remove the paper mask.
Using Distress Inks, paint the scarf and floor with Rusty Hinge and Alfie with Scattered Straw.
Matt and layer onto Chestnut and Ginger Foundations Card.
Stamp the Dot Background onto a larger piece of Coconut White Card with Saffron Archival Ink.
Emboss with the A4 Interlocking Circles Folder.
Highlight the raised areas with Scattered Straw Distress Ink.
Matt and layer with the Chestnut and Ginger Card.
Matt and layer strips of the same colour card and attach Yellow and White Bakers Twine.
Glue onto the background.
Stamp the sentiment from the "Paws-Itiveley" set onto the main image with Black Archival Ink.
Add to the main card with 3d foam pads.
And there's the finished card!
Hope you like it. Reverse Masking is a great way of adding detail to a stamped image. The stamp shouldn't have too much detail for this to work.
Anyway, that's it for this week. I'll be back next Tuesday with another project. Many thanks for stopping by and until next time, have a happy, crafty week!
Good Morning All and a very Happy Tuesday!
I'm back again with another design for Creative Expressions using the Singles Cats and Dogs range of stamps.
This time I've used the Triplets stamp so without further ado, let's get started....
Ink up the stamp with Black Archival and stamp onto Coconut White Card.
Paint the cats with Scattered Straw, Wild Honey and Gathered Twigs Distress Inks.
Paint the ball of wool with Festive Berries and the floor area with Tattered Rose.
Matt and layer the picture onto Foundations Ginger and Chestnut Card.
Matt and layer the same card onto a C5 sized card.
Cut a piece of Coconut White card to go onto the Ginger card.
Cut strips of Teresa Collins 8x8 paper and glue into place on the white card. Matt and layer onto the Ginger card.
Add some red and white Bakers Twine to the ball of wool and allow the edges to trail. Glue into place with Cosmic Shimmer Dries Clear Glue.
Stamp the sentiment from "Paws-Itively Great" onto Coconut White Card using Black Archival Ink.
Matt and layer as before.
Glue more Bakers Twine into position before adding the sentiment with 3d foam pads.
And there's the finished card!
Hope you like it, I love the sentiment...it really made me chuckle! I had a cat that used to do just that!!
Anyway, many thanks for visiting. I'll be back next Tuesday looking at a technique that I call Reverse Masking. Hope you can join me.
Until next time, have a happy, crafty week!
Good Morning and a very Happy Tuesday and a Happy New Year!
I hope everyone had a great Christmas and that Santa brought you all the crafting goodies you wished for!
I've had a new batch of Singles stamps from Creative Expressions to play with over Christmas (it felt like an extra pressie!)
So without further ado, here's my first DT piece using them. I've used "Pickle" for this one as well as the "Paws-Itively Great" sentiment stamps and the "Paw print Lattice" Background stamp.
Ink up Pickle with Black Archival Ink and stamp onto Coconut White Card.
Stamp again onto 2 different pieces of Couture Creations Damask Delight paper.
Cut out the paper images and glue onto the original image using the 2nd paper for the rope.
Cut a piece of Coconut White card for the background. Randomly stamp the Paw Print Lattice background with Citrus Adirondack Ink.
Stamp over the top with "Hang in There" using Black Archival Ink.
Matt and layer onto the same paper as the rope was cut from.
Matt and layer Pickles onto the same paper and Black Foundations Card.
Cut a Lattice Strip from the Spellbinders 3d Lattice Bow set.
Glue to the left side of the card.
Attach Pickles to the card with 3d foam pads.
Die cut the Lattice Bow using the same 2 papers as before. Glue the smaller one on top and add a Small Round Black Circle Dazzler to the centre. Glue into place on the card.
And there's the finished project!
Everything used on this card is from Creative Expressions. I do hope you like it.
As you read this, I'll be setting off on a cruise to Rio (Steve is working on it). I have all my projects scheduled and ready to go until I get back on the 23rd.
So until next time, have a happy, crafty week and please stop by while I'm away....I've got some lovely projects lined up!!
Good Morning All and a very Happy Tuesday!
I've made a wall hanging for today's DT piece with a sentiment that I agree with totally! I'm planning on hanging it in my kitchen where I shall do my best to follow the advice!
Anyway, let's get started....
Paint a small wooden plaque with Cosmic Shimmer Midnight Matt Chalk Paint.
Ink up the "Life is Short" Singles stamp with Perfect Medium. Stamp onto the plaque and heat emboss with Cosmic Shimmer Bright Gold Metallic Powder.
Apply Perfect Medium Ink around the edges using a piece of Cut 'n Dry Foam. Heat emboss with the same powder as before.
Ink up the Cake and Spoon stamps from the A5 Vintage Cooking set with Perfect Medium and stamp several times onto Black Foundations Card. Heat emboss with the Bright Gold Powder and cut out.
Attach to the wall hanging with 3d foam pads.
Add some Golden Light Metallic Gilding Wax to the outer edge of the plaque.
Ink up the sentiment from the A5 Vintage Cooking Set with Perfect Medium and stamp onto Black Foundations Card.
Cut to size and glue onto a piece of Grungeboard.
Apply Perfect Medium Ink around the edges as before and heat emboss with Bright Gold Powder.
Attach to the plaque with Black Seam Binding.
Make a loop of Black Seam Binding and attach to the top of the plaque with Cosmic Shimmer Dries Clear Glue as a hanger.
And that's the finished project! Hope you like it.
I'm going to be having a couple of weeks off blogging over Christmas but I'll be back in the New Year with new stamps and ideas. Please pop back on January 6th to see what I've made!
In the meantime, have a Very Happy Christmas and a fab New Year. see you all soon..................
Good Morning All and a very Happy Tuesday!
I've finally had a chance to play with the gorgeous new stamps from Creative Expressions and here's my first one for the design team.
Squirt some very cheap Shaving Foam onto a plate. Level it out with a ruler then add drops of Dusty Concord and Broken China Distress Re-Inkers onto the shaving foam. Make swirly patterns in the foam.
Press a piece of Coconut White Card into the foam, lift off and remove the excess with a ruler. Wipe off any last bits with a piece of kitchen towel.
Ink up the Mix Things Up Singles stamp with Black Archival. Stamp over the swirly background then heat emboss with Cosmic Shimmer Clear Powder.
Distress the edges of the card with Dusty Concord Ink.
Matt an layer onto Coconut White and Black Foundations Card.
Stick onto the blank card. Stamp around the edges of the card with Black Archival Ink using the small sentiment and heart stamps from Creative Expressions A5 Vintage Cooking stamp set.
And there's the finished card!
Apart from the foam, everything used is from Creative Expressions.
I do love using the shaving foam technique but often forget about it! Sometimes it's good to re-visit old techniques!!
Well, that's it for today, I'll be back next Tuesday with another DT piece.
Have a happy, crafty week!!
Good Morning all and a Very Happy Tuesday!
Another project this week using products from Creative Expressions. I always love it when I get new stamps from them to play with and the new dance stamps are no exception.
I've made a wall hanging for this weeks project as I wanted to make a little Xmas gift for a friend...here's hoping she likes it!
Anyway, let's get started......
Cover a Pronty Wall Plaque with Couture Creations 12x12 Damask Paper. Paint around the edges with Black Soot Distress Paint.
Place the Sunrise Mask over the top half of the plaque. Dab through the mask with Flake and Glitter Glue.
Remove the mask then apply Cosmic Shimmer Aurora Lights Gilding Flakes.
Dab the glue around the edges of the plaque then apply more of the Gilding Flakes.
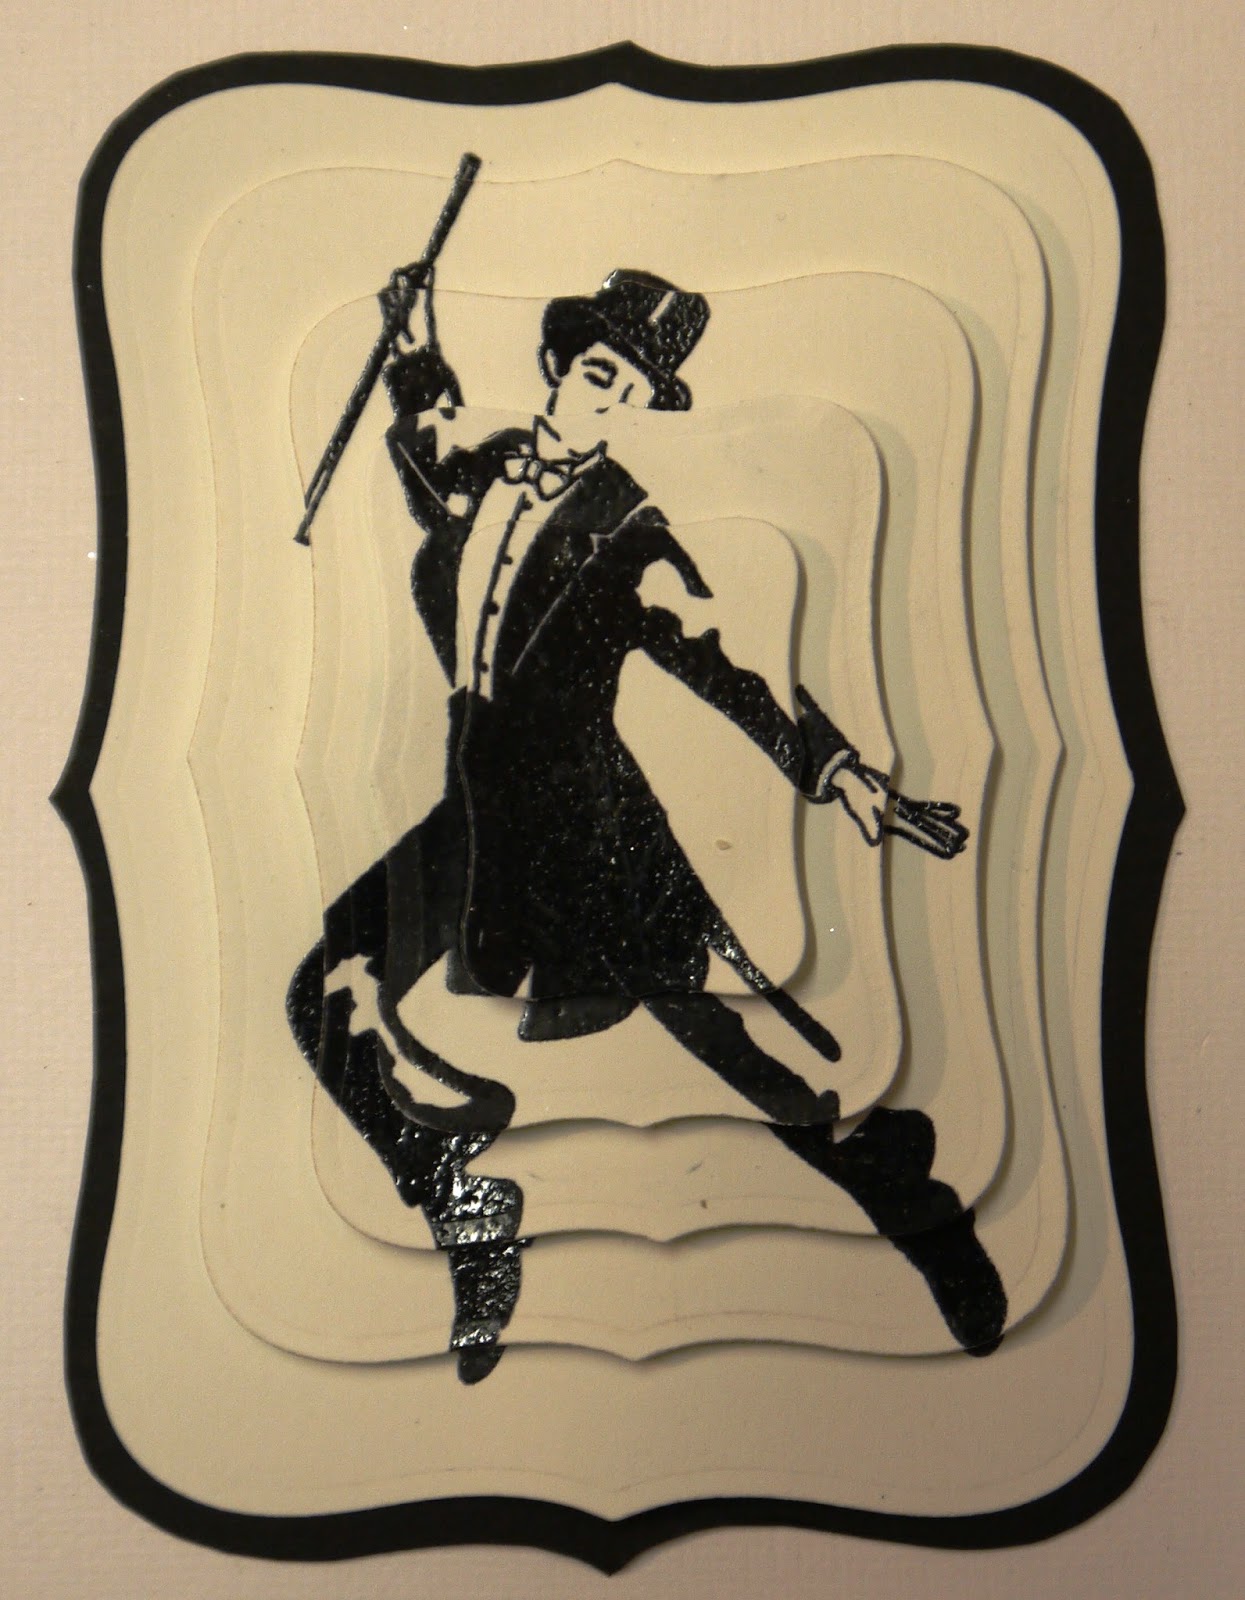
Ink up the "Top Hat and Tails" Singles Stamp with Black Archival Ink and stamp 5 times onto Coconut White Card. Heat emboss with Cosmic Shimmer Clear Powder.
Die cut the stamped images with Spellbinders 8 Labels.
Position them so that the image is cut with an even border each time but getting progressively smaller.
I hope that the picture explains what I mean!
Draw around the largest die used onto Black Card then cut out. Glue the largest of the dancers images onto the black card, then build up the layers using 3d foam pads.
Ink up the sentiment from the A5 "Step by Step" Stamp Set with Black Archival. Heat emboss with Cosmic Shimmer Clear Powder.
Cut out with the Spellbinders Standard Circles Small Dies.
Draw around the outer edge of the die on black card then cut out as a matt.
Glue the dancer and sentiment onto the plaque.
Add Black Seam Binding as a hanger.
And that's the finished project...hope you like it!
Julia Watts has done such a good job using these stamps that I wanted to do something very different with them. Do go to her blog and take a look, there are some gorgeous cards using the dance stamps.
Well, that's it for today...can't believe that it's December already! Where has this year gone!!
So, until next time, have a happy, crafty week!