Good Morning All and a very Happy Thursday!
Well, I've been tasked by Creative Expressions to make Christmas cards! On the hottest day of the year (so far) I've been thinking snow, carols, trees.....
Anyway, this is the first one of the month for you.
Die Cut the Illuminated Christmas Tree from Foundations Vintage Gold Card.
Emboss a piece of Coconut White Card with the A4 Snowflake Lattice Folder.
Die cut the Finishing Touches Classic 3d Bow using the Vintage Gold Card.
Glue the strip from that set onto the embossed card and trim to size.
Matt and layer onto Vintage Gold card
Glue the tree into position.
Die cut the Finishing Touches 3d Filigree Bow from Coconut White Card. Glue onto the Gold Bow. Fold onto a 3d shape then glue onto the gold strip.
Add a small black Dazzler to the centre of the bow.
Ink up the sentiment from the A5 Filigree Christmas Set with Black Archival and stamp onto Coconut White Card. Heat emboss with Cosmic Shimmer Clear Powder.
Cut into a banner shape. Matt and layer onto Gold Card.
Shape and glue into position.
Add a small Black Dazzler to the tree to finish.
And there's the finished card!
I wanted to make a card that was quick but elegant and would be suitable for a man or woman to receive.
Although the tree is very detailed, it cut beautifully but I would use wax paper to help lift it from the die.
I've used Cosmic Shimmer Dries Clear Glue to stick everything down. Again, the filigree work on the bow and the tree is very detailed and there isn't a lot of room for the glue, but a few drops of this glue works beautifully.
Well, that's about is for this week....I'm going to stand under a cold shower and cool off!
Don't forget to leave a comment if you'd like to be entered for a chance to win the wall hanging. Many thanks for visiting, it is much appreciated.
Until next time, have a happy, crafty week!
Good Morning All and a very Happy Thursday!
Back again using the Portuguese Collection-Lisbon Dies for this card.
I thought I'd try and do something a little different this week so let's get started!
Using the patterned die from the set, cut 3 times in a row on a piece of Foundations Rich Plum Card.
Emboss a piece of Foundations Lilac card using the A4 Sea Garden Folder.
Highlight the raised areas with Cosmic Shimmer Vintage Plum Gilding Wax.
Matt and layer onto a piece of the Rich Plum Card. Attach onto the blank C5 card.
Glue the cutout panel into position.
Die cut 2 more shapes from the Lisbon Collection. The frame from Rich Plum using a frame and inner shape and the other from the lilac card.
Stamp the sentiment from the A5 Dandelion Wishes set with Black Archival Ink onto the lilac card. Heat emboss with Cosmic Shimmer Clear Powder.
Stamp around the edges with a small stamp from the Cherry Blossoms Elements Stamp Set by John Lockwood.
Matt and layer using 3d foam pads.
Attach to the card with 3d pads.
Tie a double bow using Creative Expressions Satin Crush Ribbon.
Attach to the card with dry glue dots.
Add a large Lilac Dazzler to the centre to finish.
and there's the finished card. Very different to last weeks but still using the same die set.
Well, I'd better get off here now....packs to prep for the full day workshops at Martells!
Many thanks for stopping by and leaving comments, they do mean a lot to me.
Until next Thursday, have a happy, crafty week!
Good Morning All and a Very Happy Tuesday!
I can't believe that it's the end of the month already but that means this is the last blog using the new Couture Creations Dies and onto something new next week!!!
I think I've saved one of the best till last but I'll let you be the judges of that! Anyway, here goes....
Cut a square of Couture Creations Vintage Rose Garden paper to size and distress the edges with a pair of scissors.
Cut a strip of coordinating paper to size and distress with scissors. Glue onto the square of paper then matt and layer onto Black Foundations Card.
Cut an Oval using Spellbinders Classic Oval Large Dies from Coconut White Card. Leave the die in place and lightly distress with Antique Linen Ink.
Die cut Couture Creations Intricutz Vintage Rose Collection Garden Lamp from patterned paper.
Glue onto the oval.
Cut the same die using white card and cut off the banner at the bottom. Stamp the sentiment Breathe from the Creative Expressions A5 Art Sayings Stamps.
Glue onto the paper die.
Cut a Spellbinders Scalloped Oval from Black Card to matt.
Attach to the card with 3d foam pads.
Die cut Spellbinders Spiral Blossom 3 using paper from the pad. Roll into 3d flowers.
Use a little Shabby Shutters Distress Ink on the edges of the petals.
Glue onto the card.
Use the Spellbinders Foliage Dies to cut leaves from black card. Glue into position.
Cut the word "Smile" from one of the pieces of paper in the pad. Matt and layer onto black card.
Add to the main card with 3d foam pads to finish.
And there we have it!
I hope the instructions were clear!
Well, that's it for this week. As always, many thanks for your visit and leaving comments.
I'll be back next week with new goodies to show you and I might even leave a few hints about what I'll be demoing at Ally Pally!!!
Until next time, have a happy, crafty week!
Good Morning All and a very Happy Tuesday!
Have you seen the blog challenge running on the Creative Expressions site, if not, pop over there and take a look. As it's Easter themed, the design team were asked to come up with an Easter card to give you some ideas so here's mine!
Stamp the chick from the A5 UMChick set of stamps with Black Archival Ink onto Coconut White Card.
Paint the chick with Sunshine Yellow and Sunset Orange Adirondack Inks.
Stamp again onto Couture Creations 6x6 paper from the Vintage Rose Garden Pad.
Cut out the egg parts and glue onto the 1st stamped image.
Cut out using the Spellbinders Classic Oval Large Dies.
Cut a matt from the paper pad with the Spellbinders Classic Oval Scalloped Dies.
Glue together.
Ink up the Daisy stamps from the A5 Bunnies set (UMBunnies) with Dandelion Archival Ink. Stamp onto a piece of white card for the background.
Cut 2 strips of co-ordinating papers from the pad and glue into position just under the daisies.
Before matting and layering onto patterned paper (spot the deliberate mistake!) mask off the bottom edge of the strip of paper and stamp the flower heads.
I've had to mask off a larger area as I matted and layered..oops!
Now matt and layer onto a piece of patterned paper!!!
Decide where the chick is going and before sticking down, stamp the sentiment from the Chick set. The sentiment is one stamp so I inked up the first word, stamped it then repeated with the 2nd word.
Glue the chick into position and add 3mm faux pearls to the flower centres and 5mm ones to the edges of the strip of paper.
And there's the finished card....I hope it's given you a few ideas for the challenge.
Everything used for this card is from Creative Expressions.
Once again, many thanks for visiting and leaving comments. They are much appreciated.
So, until next time, have a happy, crafty week!
Good Morning All and a very Happy Tuesday!
I though that this week I'd revisit a favourite technique of mine that works brilliantly with silhouette stamps and that's faux brayering.
I've used the new Singles stamps from Creative Expressions and this one is called "My Ex".
Anyway, here we go...............
Mask off an area of gloss card with stick notes.
Starting with the lightest colour at the top, apply stripes of ink across the card using Cut 'n Dry Foam. Go back over with the lightest colour to blend.
I've used Sunshine Yellow, Peach Bellini and Citrus Adirondack Inks. This works just as well with Distress Inks.
Remove the sticky notes.
Ink up the stamp with Black Archival and stamp so that part of the image goes outside the coloured area.
Stamp the sentiment with the same ink.
Stamp dots from the A5 Doodle Flower set with Black Archival Ink.
Matt and layer onto Black Foundations Card.
Emboss a piece of Coconut White Card using the A4 Rows of Bows Embossing Folder.
Matt and layer onto black card.
Add a length of Black Seam Binding before gluing onto the blank card.
Add the stamped image with 3d foam pads.
Tie a triple bow with the seam binding and glue into position to finish.
And there it is! It's such a quick card to make and you can get some fab backgrounds in all sorts of colours. I hope you like it.
Well, that's it for this week. I'll be back next Tuesday with another background technique, hope you'll stop by.
Many thanks for visiting and leaving comments.
Until next time, have a happy, crafty week.
Good Morning All and a very Happy Tuesday!
I've made a wall hanging for today's DT piece with a sentiment that I agree with totally! I'm planning on hanging it in my kitchen where I shall do my best to follow the advice!
Anyway, let's get started....
Paint a small wooden plaque with Cosmic Shimmer Midnight Matt Chalk Paint.
Ink up the "Life is Short" Singles stamp with Perfect Medium. Stamp onto the plaque and heat emboss with Cosmic Shimmer Bright Gold Metallic Powder.
Apply Perfect Medium Ink around the edges using a piece of Cut 'n Dry Foam. Heat emboss with the same powder as before.
Ink up the Cake and Spoon stamps from the A5 Vintage Cooking set with Perfect Medium and stamp several times onto Black Foundations Card. Heat emboss with the Bright Gold Powder and cut out.
Attach to the wall hanging with 3d foam pads.
Add some Golden Light Metallic Gilding Wax to the outer edge of the plaque.
Ink up the sentiment from the A5 Vintage Cooking Set with Perfect Medium and stamp onto Black Foundations Card.
Cut to size and glue onto a piece of Grungeboard.
Apply Perfect Medium Ink around the edges as before and heat emboss with Bright Gold Powder.
Attach to the plaque with Black Seam Binding.
Make a loop of Black Seam Binding and attach to the top of the plaque with Cosmic Shimmer Dries Clear Glue as a hanger.
And that's the finished project! Hope you like it.
I'm going to be having a couple of weeks off blogging over Christmas but I'll be back in the New Year with new stamps and ideas. Please pop back on January 6th to see what I've made!
In the meantime, have a Very Happy Christmas and a fab New Year. see you all soon..................
Good Morning all and a Very Happy Tuesday!
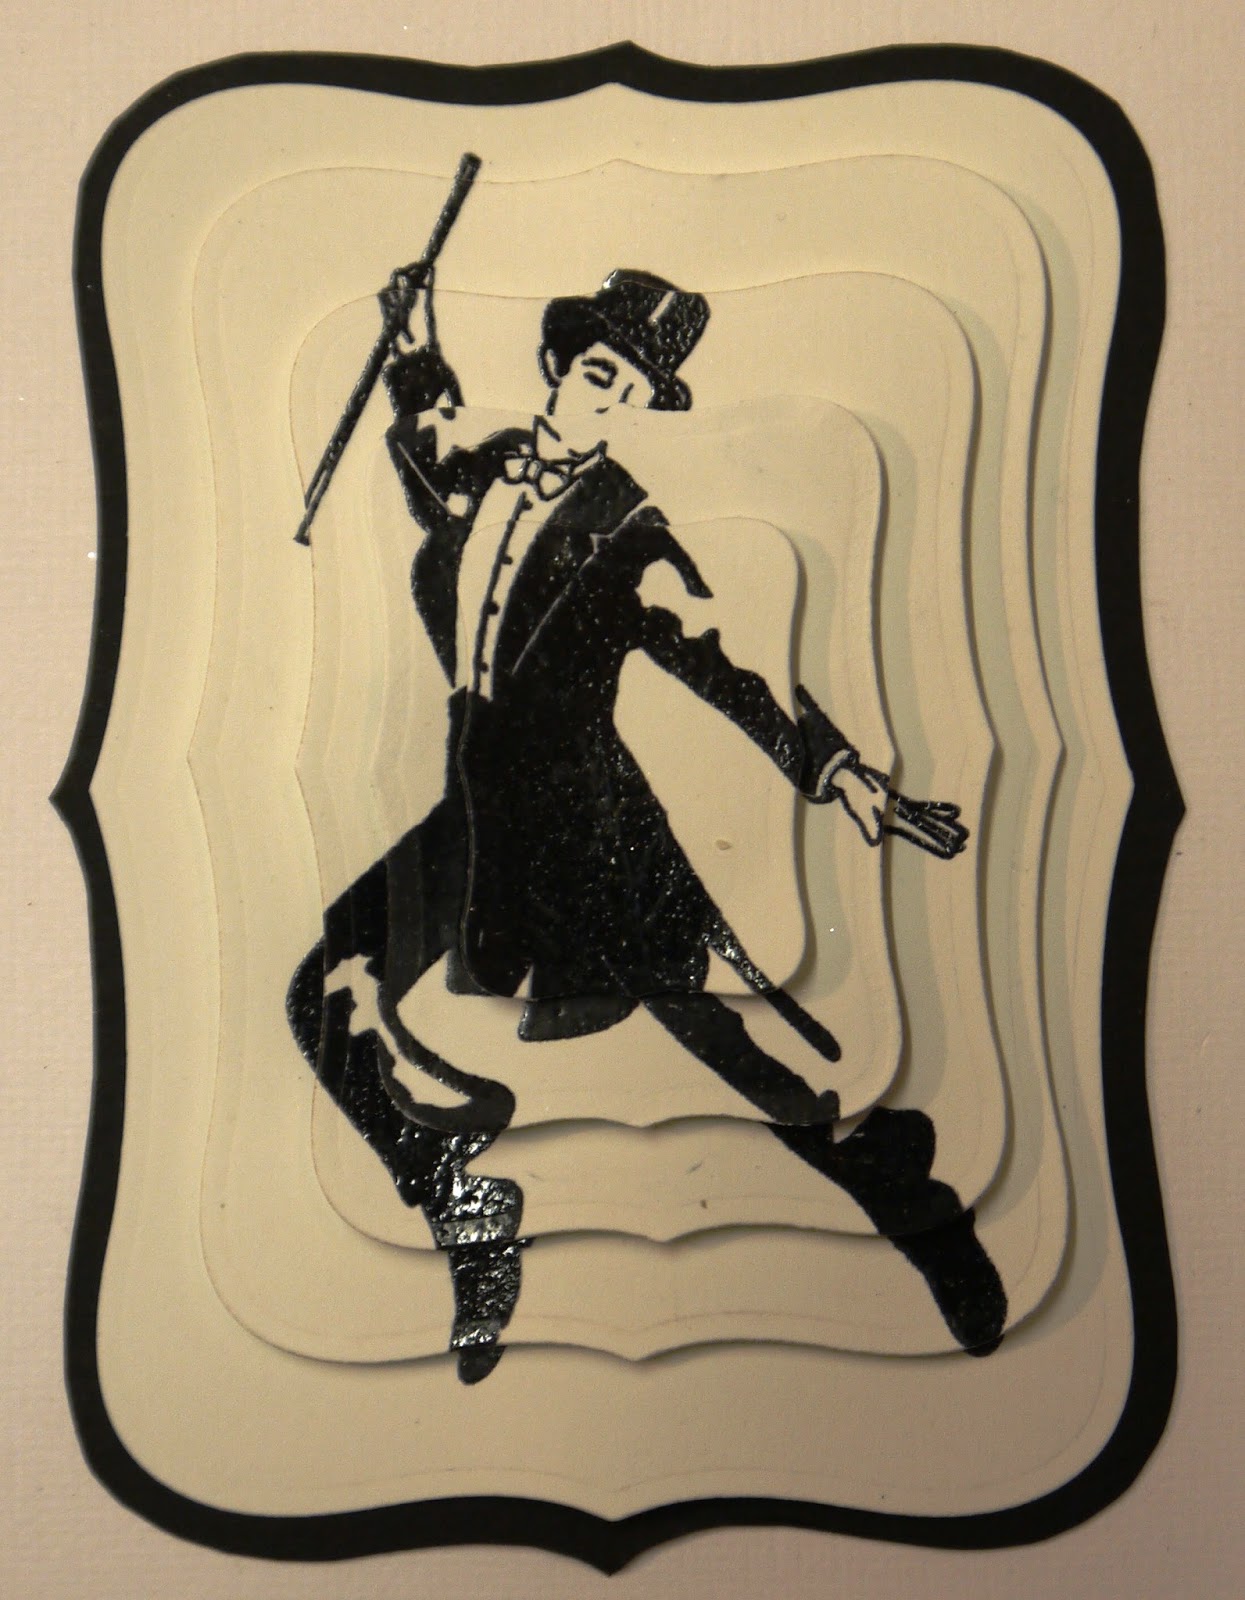
Another project this week using products from Creative Expressions. I always love it when I get new stamps from them to play with and the new dance stamps are no exception.
I've made a wall hanging for this weeks project as I wanted to make a little Xmas gift for a friend...here's hoping she likes it!
Anyway, let's get started......
Cover a Pronty Wall Plaque with Couture Creations 12x12 Damask Paper. Paint around the edges with Black Soot Distress Paint.
Place the Sunrise Mask over the top half of the plaque. Dab through the mask with Flake and Glitter Glue.
Remove the mask then apply Cosmic Shimmer Aurora Lights Gilding Flakes.
Dab the glue around the edges of the plaque then apply more of the Gilding Flakes.
Ink up the "Top Hat and Tails" Singles Stamp with Black Archival Ink and stamp 5 times onto Coconut White Card. Heat emboss with Cosmic Shimmer Clear Powder.
Die cut the stamped images with Spellbinders 8 Labels.
Position them so that the image is cut with an even border each time but getting progressively smaller.
I hope that the picture explains what I mean!
Draw around the largest die used onto Black Card then cut out. Glue the largest of the dancers images onto the black card, then build up the layers using 3d foam pads.
Ink up the sentiment from the A5 "Step by Step" Stamp Set with Black Archival. Heat emboss with Cosmic Shimmer Clear Powder.
Cut out with the Spellbinders Standard Circles Small Dies.
Draw around the outer edge of the die on black card then cut out as a matt.
Glue the dancer and sentiment onto the plaque.
Add Black Seam Binding as a hanger.
And that's the finished project...hope you like it!
Julia Watts has done such a good job using these stamps that I wanted to do something very different with them. Do go to her blog and take a look, there are some gorgeous cards using the dance stamps.
Well, that's it for today...can't believe that it's December already! Where has this year gone!!
So, until next time, have a happy, crafty week!
Good Morning All and a Very Happy Tuesday!
I've gone with a very traditional look for today's project. I've used the A5 Christmas Florals Stamp Set from Creative Expressions for this card.
Well, enough chat, let's get started!
Ink up the Poinsettia stamp with Black Archival and stamp several times onto Coconut White Card. Heat emboss with Cosmic Shimmer Clear Powder.
Paint the flowers with Festive Berries Distress Ink.
Cover the card with a sheet of Double Sided Adhesive. Cover with Cosmic Shimmer Diamond Sprinkles then cut the flowers out.
Ink up the Poinsettia Stamp with Festive Berries Distress Ink then randomly stamp onto a piece of Coconut White Card.
Dry Emboss with the A4 Festive Swirls Folder.
Matt and layer using Ruby and Brunswick Green Foundations Cardstock.
Stamp the sentiment with Black Archival Ink onto Coconut White Card. Heat emboss with Clear Powder. Cut out with the Spellbinders Standard Circles Small Die. With the die still in position, distress with the Festive Berries Ink.
Cover with double sided adhesive then apply the Diamond Sprinkles. Cut out.
Draw around the outer edge of the die and cut out the circle.
Die cut 2 Spellbinder Scalloped Circles.
Matt and layer adding the sentiment with 3d foam pads.
Die cut the Festive Collection Pine Bough from the Brunswick Green Card. Glue into position on the card.
Glue some of the Poinsettias into place then add the rest with 3d foam pads.
Glue a piece of red Seam Binding to the back of the sentiment.
Attach to the card with 3d foam pads.
And there's the finished card!
I do hope you like it....you could add some gems to the flower centres for a bit of extra bling...after all, it is for Christmas and that's the one time of year you can really go to town!!!
Well, that's all for this week. Many thanks, as always, for visiting and leaving comments.
I'll be back next week with another project, this one isn't Christmas related but I have made it to give to a friend as a little Christmas present.
Until next time, have a happy, crafty week!
Good Morning all and a Very Happy Tuesday.
I thought I'd share a project for Christmas to decorate a door with. All of the products used are from Creative Expressions except for the chipboard hanger.
So let's get started.....
Cover a chipboard hanger with Couture Creations Vintage Christmas Paper.
Cut out the sentiment from a piece of the same paper.
Matt and layer the sentiment onto coordinating paper.
Apply Flake and Glitter Glue to the small Holly Spray Stamp from the A5 Christmas Post Stamp Set. Stamp randomly onto the door hanger then apply Cosmic Shimmer Mulled Wine Gilding Flakes.
Paint around the edges of the hanger with Black Soot Distress Paint.
Colour a piece of Coconut White Card with Evergreen Bough and Frayed Burlap Distress Inks. Stamp the Robin from the Christmas Post Set with Black Archival Ink onto the coloured card.
Heat emboss with Cosmic Shimmer Clear Powder.
Lift some of the colour from the image with a wet paintbrush to give highlights.
Cut out with Spellbinders Standard Circles Small Dies.
Draw around the outer edge of the die on black card and cut out.
Cut out the next largest die using Coconut White Card with Double Sided Adhesive on it.
Apply Mulled Wine Gilding Flakes. Matt and layer attaching the top layer with 3d foam pads.
Apply Evergreen Bough Distress Ink over the top of the sentiment. Cover with Cosmic Shimmer Clear Embossing Powder then heat emboss.
Cut a piece of Coconut White card and, using the double sided adhesive, apply Gilding Flakes as before.
Cut a piece of black card then matt and layer the sentiment adding the top layer with 3d foam pads.
Attach the Robin and the Sentiment to the hanger with 3d foam pads.
And there's the finished project!
I do wish I could pass the real thing around for you all to look at....the photo really doesn't do it justice! The colour of the background paper looks much lighter in the photo than it does on the actual project and the colours go together so well.
Anyway, hope you like it! Well, that's it for this week. Many thanks for stopping by and leaving comments. I'll be back next week with another project for Christmas so until then, have a happy, crafty week!
Good Morning All and a Very Happy Tuesday.
As promised last week, I'm back with another idea for Christmas. This is the one time of the year when I really feel that I can get my glitters out and "go to town!"
All of the products I've used are from Creative Expressions.
So, without further ado, let's get started....
Apply Cosmic Shimmer Flake and Glitter Glue to the Tree from the Christmas Swirl A5 Stamp Set.
Stamp onto Coconut White Card. Using one colour at a time, apply Cosmic Shimmer Golden Sand, Sahara Gold and Pale Bronze Polished Silk Glitters. Trim to size.
Emboss a piece of Coconut White Card with the A4 Sue Wilson Snowflake Lattice Folder. Matt and layer onto Foundations Vintage Gold Card. Matt and layer a strip of the embossed card.
Stick the strip onto the side of the card with 3d foam pads.
Matt and layer the tree and attach to the card with pads.
Apply Flake and Glitter Glue to the sentiment and glitter as with the tree. Cut it out with Spellbinders Lacey Ovals Dies.
Die cut the Festive Collection Holly Sprays from Coconut White Card. Glue into position.
Cut a piece of Gold Tulle and scrunch it in the centre. Use a glue dot to attach to the card.
Add the sentiment with 3d foam pads.
And there's the finished card!
It's ideal to make if you need a batch of quick yet effective looking cards.
Well, that's it for this week. I hope you like the card.
Many thanks for stopping by and leaving comments, they're much appreciated!
Until next time, have a happy, crafty week!